Tuesday
Feb112014

Quick Bathroom Storage Update

The house Mr. Ramon and I are currently renting went through a total renovation right before we moved in. This 1909 home has some great qualities: original hardwoods downstairs, large closets in each of the 3 bedrooms and a lovely brand new kitchen. Overall the remodel was done pretty well and enhanced the homes value. One big downfall for me is the paint color scheme chosen - the main part of the home  including the ceilings is a "neutral" we call zombie skin and the bath and a half are painted a sage-ish operating green. To say I can't stand this color is an understatement. 

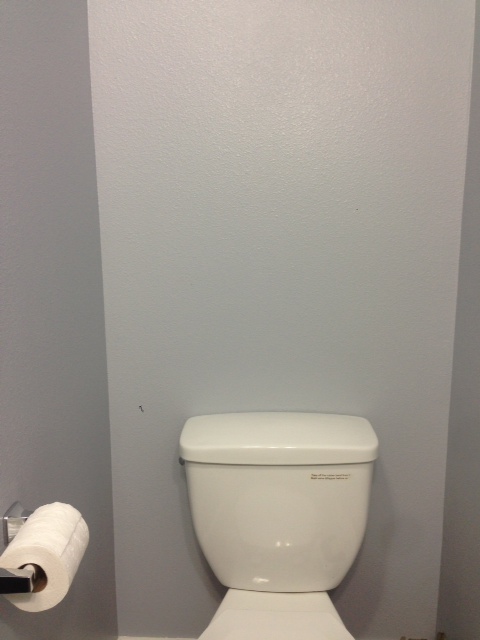
I knew I needed to remedy this bathroom paint choice. I decided to go with a blue grey for both bathrooms. It was an instant change for the better. I wanted to take the downstairs bathroom one step farther. It is pretty bland with a toilet and a pedestal sink with mirror only. No storage options at all. 

There is a lot of space over the toilet for a couple of shelves. This would add some storage options for my makeup brushes, maybe some pretties and a candle for when we have dinner parties. 

I picked up 2 sets of metal shelf brackets at Lowe's. I wanted to add a pop of color to this project so I painted the brackets a neon orange. I love spray paint it is so magical in the way it can transform just about anything. I used this spray painting tutorial to get smooth results. I did use a primer - not only to get it smooth and consistent but to also make the neon paint pop. 

I bought a plain board and cut it the length I needed for the 2 shelves. I then painted it a nice glossy white. But you could easily buy 2 pre made white shelves at any home store. Once every piece had dried for a couple of days I hung them over each other. 

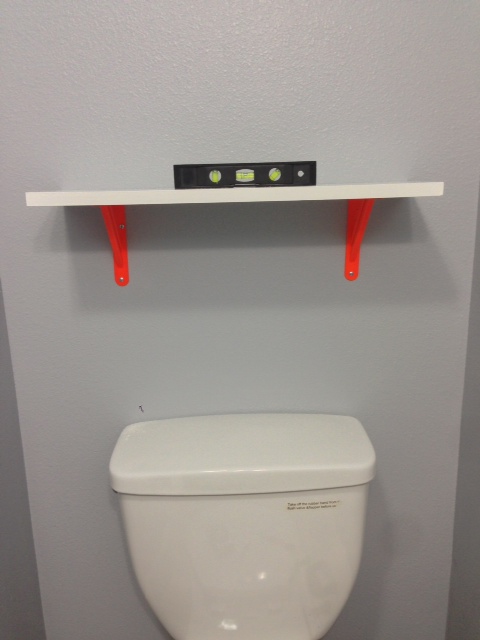
This is where precision comes in. First I marked the center of this wall with pencil. I had a specific small area to hang these sheves in and wanted them to be centered. I also marked the center of the shelf. I lined these 2 marks up and made marks at each end of the shelf on the wall. This allowed me to figure out where each bracket should be. 

I placed the first bracket into the wall with one screw. I then rested the shelf on the attached bracket and used my level to ensure I had the second bracket in the correct location and the shelf was level. I marked a dot in the hole of the second bracket where the screw would go and took off the shelf. I then attached the second bracket wth both screws and placed the second screw in the first bracket. 

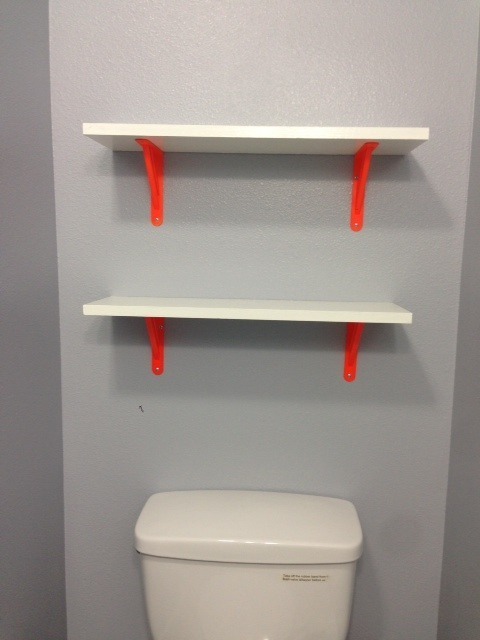
The second shelf was easy - I just figured out what spacing I wanted by holding the shelf up to the wall. Then I used the bottom shelf as a guide and hung the brackets. 

The shelves I used were thin so I didn't want to screw the shelf to the brackets. I knew that these shelves would not be holding to many items and nothing super heavy. So I opted for attaching the shelves to the brackets with a strip of Liquid Nails adhesive that I had left over from another project. 

Here they are all done. I let the paint cure on them for about a week before I put anything on them. 

A week later I added some pretty touches and voila - storage!!

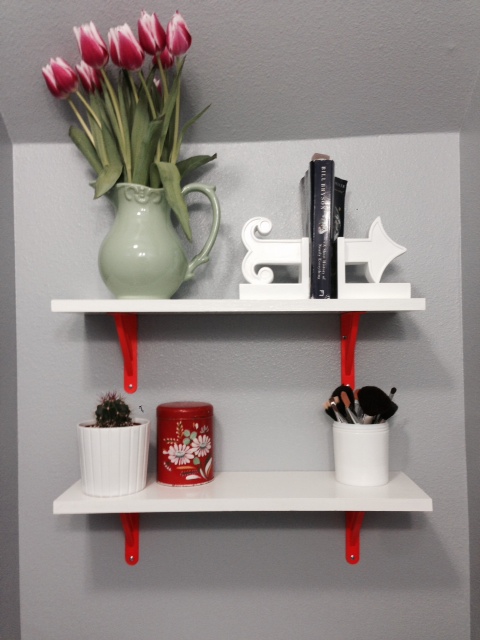
I was so glad to get some personality into this space and add a little much needed storage. 

Wednesday
Feb052014

Celebrating Wedding Anniversaries

I have always loved celebrating milestones. Growing up my mom took birthdays, anniversaries and other milestones very seriously. Our birthday parties were always something to remember - from surprise parties to large gathering of friends. I can't remember when I was first aware of my parents wedding anniversary, but at some point I knew that this special day existed. These moments were filled with tokens of love from flowers and cards to jewelry and other gifts. I knew that these anniversaries were important moments and something to be treasured.

Mr. Ramon and I are celebrating our 3rd wedding anniversary this year. From the beginning of our marriage I knew I wanted to find a neat way to celebrate our anniversary. I thought of the universal list of wedding anniversary gifts and knew that we could use that as the basis for any gift giving when our anniversaries rolled around. 

The history of giving certain gifts for certain milestones dates far back to medieval times when milestones of 25 and 50 years together were celebrated. The list became even more popular during the Victorian era when additional gifts for certain milestones were added. The gifts start off with modest materials like pottery and paper and over time the value of the gift material increases to the likes of silver and diamond. 

There are two versions of this anniversary gift list - the traditional list with items like paper, tin and fruit on it and a more updated list that replaces some of these items with modern gifts like clocks, appliances and desk sets. We settled on the tradional list for our anniversary gifts. 

For our first anniversry paper was the tradional gift on the list. We both suprised each other with art for this anniversary. I had been eyeing an amazing poster from this great design site - Super Rural for some time and it was perfect for my gift to Mr. Ramon. I framed it in a big white frame and we hung it over our first floor landing. 

When our second anniversary came around we both embraced the theme of cotton. Mr. Ramon chose a cotton canvas bag from Seattle company Filson. I was starting a new job around this time and it was a practical and beautiful gift. Mischa thought this bag was for her!

For Mr. Ramon I tried to find something reallly unique that would celebrate our special day. I found someone on Etsy that makes cotton knit infinity scarves with hand printed wording on them. I chose to have the lyrics of the song I walked down the isle to - Radiohead - All I Need printed on it. I was really excited about this gift and it looks awesome on Mr. Ramon.

This year the list prompted us for leather gifts. There were a lot of "normal" leather gift type items Icould have picked up for Mr. Ramon - wallets, watch, key fob etc. He has some really nice leather items already that do not need upgraded or replaced. So I opted for a ver nice pair of leather boots that he can wear often and get some gret use from. 

Mr. Ramon was a little more practical and I was super excited about my gift. He chose a pair of fancy leather LL Bean slippers. I have been wearing the same worn out, ratty slippers for several years. This gift is going to be great at keeping my toes warm in our cold house!

I look forward to many more anniversaries with Mr. Ramon and using this list to guide our gifts. Would love to have you share how you celebrate anniversaries and milestones.  

Monday
Jan202014

Morning Glory Muffins

There have been so many preparations on my plate for baby and making it through the holiday season with my sanity intact, that the new year seemed to show up rather quickly for me. I am not one to make resolutions but after a season full of indulgences, finding ways to incorporate healthier food options back in to my diet is one thing I always try to do when the new year begins. 

Mr. Ramon and I are taking a fantastic birth class series through Northwest Natural Childbirth . One of the things we talk about each week is nutrition. We each bring a snack to class based on a food group. This week we had to bring a snack that had eggs in the ingredients. As a baker I knew I wanted to bring a baked good that would be healthy and have the featured ingredient in it. 

I decided to work out a recipe for a really healthy muffin full of dried fruit, whole wheat flour and nuts. When I was working for Starbucks back in the day, there was an amazing muffin called the Morning Glory. It was full of nuts, raisins, carrots and topped with brown sugar. I loved that muffin and tried to pretend that it was actually healthy. 

The recipe here is less sweet and contains no oils or fats in the recipe. In their place I used a mixture of yogurt and mashed ripe banana. I chose a hearty variety of dried fruits - pineapple, dates and golden raisins. Wheat germ, flaxseed meal and oats added a hearty feel and a health benefit. Overall these were dense but quite moist with great flavor from the fruit and nuts. I served them with a low sugar blackberry jam. Yum.

Morning Glory Muffins

Makes 18

1 cup whole wheat flour
1/2 cup all purpose flour
1 cup rolled oats
3/4 cup packed brown sugar
1 tablespoon wheat germ
3 tablespoons flaxseed meal
2 teaspoons baking soda
1/4 teaspoon salt
1 cup plain fat free greek yogurt
1 cup mashed ripe banana (about 2)
1 egg lightly beaten
1 cup chopped pitted dates
1/2 cup golden raisins
3/4 cup chopped walnuts
1/2 cup chopped dried pineapple
1/4 cup pumpkin seeds
  1. Preheat oven to 350°.
  2. Place 18 muffin cups liners in muffin cups
  3. Combine flours and next 5 ingredients (through salt) in a large bowl; blend together
  4. Make a well in center of mixture 
  5. Combine yogurt, banana, and egg; add to flour mixture, stirring just until moist 
  6. Fold in dates, walnuts, raisins and pineapple 
  7. Spoon batter into prepared muffin cups 
  8. Top each muffin with a sprinkle of pumpkin seeds 
  9. Bake 17- 20 minutes or until muffins spring back when touched lightly in center
  10. Remove muffins from pans immediately and cool on a wire rack 
  11. Once completely cool store in an airtight container for 3 days or freeze 


Friday
Jan102014

Brown Butter Snickerdoodles

I was excited to receive a baking book for Christmas from Mr. Ramon - Baked Elements: Our 10 Favorite Ingredients. I have already been baking my way through another of their books - Baked Explorations: Classic American Desserts Reinvented for the last year. In my eyes Matt and Renato of Baked can do no wrong. They continue to push the envelope of flavor and texture and always amaze me. I love to follow them on Facebook - when I am just waking up they are already posting delicious pictures of what the bakery is offering for the day. If you love drooling over baked goods - I recommend following them! 

I have several clients that I bake assorted cookies and bars for regularly so I scanned through my new book for something to add in to my rotation. I came across their recipe for Brown Butter Snickerdoodles. I love a snickerdoodle. This is a cookie that I remember often from my childhood. When I bake classic cookies I like to see how to take them to the next level - make them the adult version of what you remember as a child. That could mean adding rum, a little more salt or in this case browning the butter for a deeper flavor. 

I am always happy with the results of the Baked recipes and this was no exception. My house was filled with the scent of brown butter and cinnamon. Yum! I hope you get a chance to make these - you will enjoy them as much as my clients did!

Brown Butter Snickerdoodles

Makes about 24 cookies

For the cookies:

1 cup unsalted butter, cut into 1/2-inch cubes
2 & 3/4 cups all-purpose flour
2 teaspoons cream of tartar
1 teaspoons ground cinnamon
1 teaspoon baking soda
1/2 teaspoon salt
2 large eggs
1 tablespoon milk
1 cup granulated sugar
1/2 cup packed light brown sugar

For the cinnamon-sugar:
3 tablespoons granulated sugar
1 tablespoon ground cinnamon

Place butter in a medium skillet. Cook over medium heat, swirling occasionally, until butter melts and foams. Continue cooking until the foam subsides, brown specks form in the bottom of the pan, and the butter turns nut brown (8-10 minutes).

Pour butter into the bowl of a stand mixer. Beat on medium-low speed for 5-7 minutes to cool the butter to room temperature.

Whisk together flour, cream of tartar, cinnamon, baking soda, and salt. Set aside.

Combine eggs and milk in a small bowl. Whisk lightly.

Turn off mixer when butter has cooled to room temperature. Add sugar and brown sugar. Beat at medium for about 2 minutes. Stop Mixer and scrape down sides of bowl. Turn mixer speed to low and pour in egg mixture. Beat until well-combined.

Add flour mixture in three portions, beating just until combined after each addition.

Gather dough into a mound in the bowl. Cover bowl and refrigerate at least an hour, or up to 24 hours.

Preheat oven to 400°. Line baking sheets with parchment paper.

Stir together cinnamon-sugar ingredients in a wide-mouth bowl.

Using about 2 tablespoons of dough at a time, roll dough into balls. Roll each ball in cinnamon-sugar to coat. Place cookies about 1 & 1/2 inches apart on prepared baking sheets.

Bake for 10 minutes, or until cookies are cracked and set. Let cool on sheets for 10 minutes then transfer to cooling racks to cool completely. 

Recipe modified from: Baked Elements

Sunday
Jan052014

Baby Nursery Mood Board

Of all of the things on the to do list for the upcoming arrival of baby - designing the nursery was something I was really looking forward to doing with Mr Ramon. Flash forward to me crying in the paint isle at Lowe's with Mr Ramon as we try to agree on paint options. Whew - 2 design minded people, one who is full of pregnancy hormones trying to bring our ideas together and compromise.

We both brought a piece of inspiration to this project. Mr Ramon found a lovely gold Jonathan Adler elephant bank at JC Pennys. It was really cool to see the entire Happy Chic Jonathan Adler collection - such stylish pieces at affordable prices. This piece brought gold as an accent to our overall look.

My contribution was a four piece collection of prints with cute kittens and flowers. When I was little - 10 or so I saved a bunch of box tops or UPC's from something to order these adorable prints from the back of some magazine - maybe Readers Digest. I can't quite remember the details, but I know that I had to have them and they were precious to me. I have held on to these 4 prints in the original packaging I received them in for at least 20 years. They now will have the chance to be framed and hang on the nursery wall.

We decided to keep the paint neutral and go entirely white. To add a graphic element Mr Ramon will be painting a diamond and heart motif on some of the walls. A pop of color will be added to the room in the form of a vintage child's armoire I am repainting Pantone Pool Green.

We wanted the room to feel clean and crisp but also add in some warmer accents with pops of color and texture. Below is our mood board that is guiding us as we move forward with the actual creation of the room. Also notice there is no crib on our mood board. We will be building this nursery to embrace some Montessori practices and will instead of a crib have a floor bed. I am exited to share these parts of our nursery with you very soon.

And If you can't tell by the kitten print or gold hearts - we are expecting a little girl!! We could not be happier!