Entries in Baked (21)

Wednesday
Oct102012

Raspberry Jam Bars

I love bar cookies. They are the simple no fuss cousins of regular cookies. Mix, dump in pan and bake. So easy. I was so excited to find myself with 2 flats of raspberries last week. I almost never indulge in reaspberries - the short growng season makes them a little too pricey for my budget. But this year our longer than usual sunny streak meant that I got a great deal on these little gems. 

I knew that jam would be in my near future. I followed the same reciped I used for my Strawberry Jam just substituting these berries. It turned out so great - sweet and the color of rubies. I had some left that would not quite fill a jar so I decided to make a batch of Jam Bars. You can use any jam on hand - I love them with apricot also. 

These are really easy to prepare and have a great butttery crust that pairs well with the sweet jam center. These are sure to disappear quickly. 

Raspberry Jam Bars

  • 1 1/2 cups all purpose flour
  • 1 1/4 cups oats
  • 1/3 cup sugar
  • 1/3 cup dark brown sugar
  • 1/4 teaspoon baking soda
  • 1/4 teaspoon salt
  • 1/2 cup walnuts chopped finely
  • 12 tablespoons butter cool room temperature cut into pieces
  • 1 cup raspberry jam

Adjust the oven rack to middle position; heat oven to 350 degrees. Line a 9x9 pan with foil allowing edges to hang over for easy removal. Spray foil-lined pan with nonstick cooking spray. 

In a mixer fitted with a paddle attachment, mix flour through nuts on low speed until combined, about 30 seconds. With machine on low, add the butter and mix until fully combined - about 2 minutes. 

Press 2/3 of the crust into the bottom of the pan with your hand until even. Bake for about 20 minutes until crust is brown. Take out of the oven and spread the jam over the warm crust with the back of a spoon. Take remainder of crust and sprinkle it over the jam. Place back in oven and bake for about 30 minutes and golden brown. 

Cool on a wire rack before removing from pan. Cut 1/4 inch of edge off on each side for a neater presentation. Then cut into squares. 

Sunday
Aug052012

Fresh Apricot Galette

My dad preferred pie over cake for desserts and occasions like birthdays. This is something I knew from a very young age and I am sure my mom told me this on many occasion. Kids usually expect cake so "why pie?". My mom knew from early on in her and my dads relationship that he liked pie. I don't think my grandmother could have made it any clearer when she gifted my mom with the "Farm Journal's Complete Pie Book" 1969ish. The inscription is priceless "Hope you have a lot of fun. Really read this book - and read the index thoroughly". Clearly the message was "my son likes pie - so you better make a good one".

Some of my fondest memories are in the kitchen with my family. One stands out more than most and although the details are a little fuzzy the facts remain the same. I remember watching from the sidelines as my parents made pies. I think it was for thanksgiving and I am pretty sure there was pumpkin involved. None the less - sitting back and enjoying that memory makes me feel happy inside. 

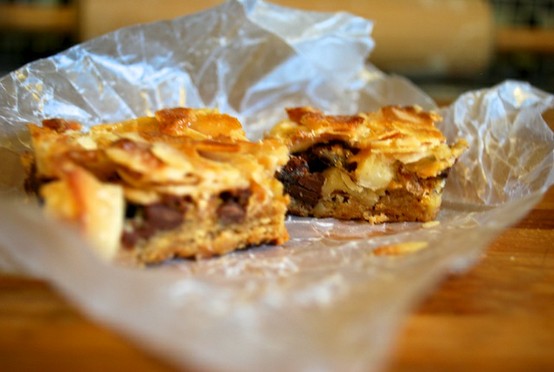
While some people love throwing together a batch of cupcakes, I love throwing together a pie, or a pie like dessert. For me crust is what my hands love to make and no freezer is complete without a crumble topping awaiting its fruit! Fruit pies are my favorite. That sweet ripe fruit baked until it is soft, wrapped in buttery crust. Fresh fruit doesn't stand a chance in our home and these apricots were no exception. 

I was excited to see the beginning of stone fruits in the local markets. How could I say no to splitting a case of local, organic apricots with one of my customers. Sweet fragrant dumplings of love these were! I have jam on my mind but it seems like a sin to not use some in a dessert. I decided to go rustic and make a galette. A galette is a rustic free form tart. Consider her the low maintenance sister to a pie. No fluted edges here. Just a crust folded up around fruit. Yum!

Pate Brisee

This recipe will make 2 crusts. You need one for this recipe. You can freeze the other for up to 2 months. I say make another galette!!  

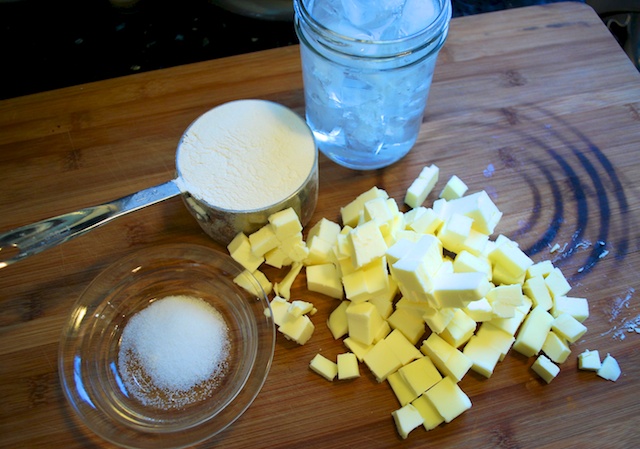
  • 2 1/2 cups of all purpose flour 
  • 1 tsp salt
  • 1 cup of cold butter cut up into small pieces
  • ice water - 1/4 cup or so

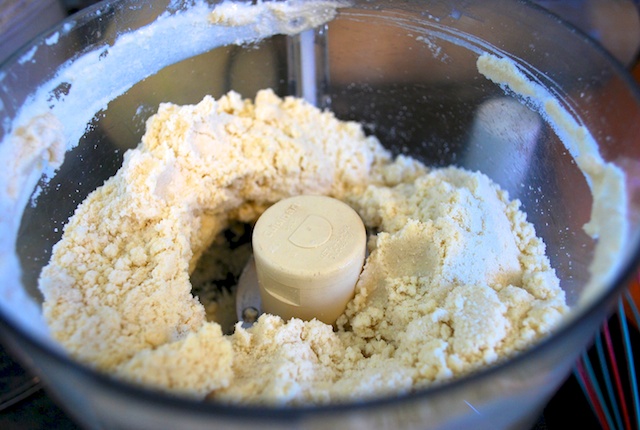
Combine flour and salt in the bowl of your food processor - pulse to combine. Add butter, pulse for about 10 1 second pulses until mixture resembles coarse crumbs with some larger pieces remaining. (To mix by hand, combine dry ingredients in a large mixing bowl, then cut in butter with a pastry blender or your fingers.)

With machine running, slowly pour  1/4 cup ice water through feed tube. When dough comes together press a small amount together; if it is still too crumbly, add a bit more water, 1 tablespoon at a time. We do not want wet or sticky dough. Do not process more than 30 seconds.


Turn out dough onto a clean work surface. Gather together then divide in half. Place each half on a piece of plastic wrap and flatten into disks. Wrap with plastic, and refrigerate at least 1 hour or overnight. 

Apricot Galette

  • 1/2 recipe Pate Brisee
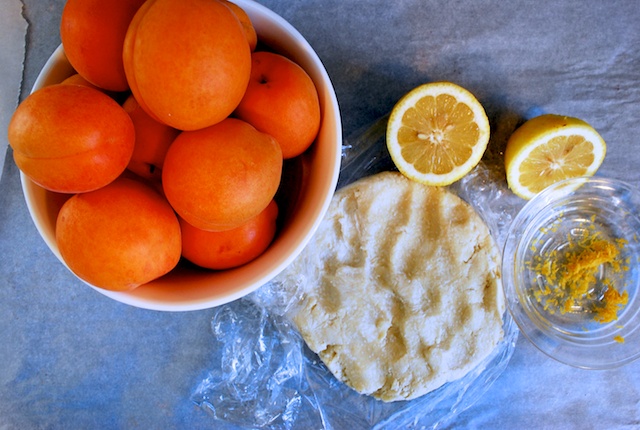
  • 1 1/2 pounds apricots - about 10
  • zest and juice from 1 lemon
  • 2 tablespoons cornstarch
  • 1/4 cup + sugar
  • salt
  • 2 tablespoons heavy cream

Pre heat over to 425 degrees

Half and pit your apricots. Slice each half into 3 sections. Place in a bowl and sprinkle with lemon juice/zest, sugar, cornstarch and a 1/2 teaspoon of salt. Toss to coat. Taste your apricots and see if they need a little more sugar. 

Roll out your Pate Brisee using a little flour to a 13' circle. Place on a parchment covered baking sheet. Place apricot mixture in the middle of the pastry leaving a 2 inch edge of pastry all the way around. Start folding up the crust over the apricots creasing as necessary to keep in the juices. 

Brush the outer pastry edges with heavy cream and sprinkle with sugar.

Place in over for 20 minutes. Turn oven down to 375 degrees and bake an additional 20 - 25 minutes until pastry is golden and apricots are bubbling. Serve warm with ice cream or my favorite at room temperature with a cup of coffee for breakfast! 

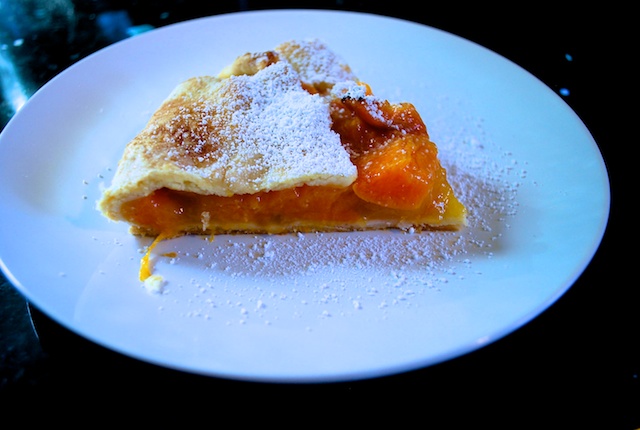
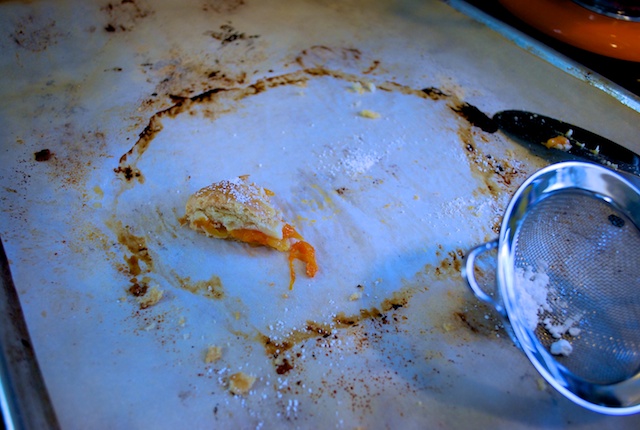
Is it bad I had some for dessert and then breakfast the next morning?

Wednesday
Jul252012

7 Layer Bars

There are a few items in the bakery category that are sure to give you a cavity upon consumption. These 7 Layer Bars are one of them. Using bittersweet chocolate and natural unsweetened cocoonut in place of semi-sweet chocolate and sweetened flake coconut makes my version a a little more grown up and a little less 3rd grade. These are really easy to make and you are sure to make some new friends with these gooey bars.

 7 Layer Bars

  • 1 cup natural unsweeteded coconut
  • 1 stick of butter melted 
  • 9 graham crackers crushed
  • 1 cup walnuts chopped fine
  • 1 cup bittersweet chocolate chips 
  • 1/2 cup white chocolate chips
  • 1/2 cup butterscotch chips
  • 1 14oz can sweetened condensed milk

Preheat oven to 350 degrees and place your rack in the lower middle. 

Spray a 13x9 inch pan with cooking spray then line pan with foil or parchment leaving an overhang on all sides. Spray the foil/parchment with cooking spray. 

Spread your coconut on a baking sheet and toast in oven until it just started to turn light brown. About 8 minutes. Let cool.

Pour your melted butter into the bottom of the 13x9 pan then sprinkle your graham cracker crumbs over it. Toss the crumbs lightly in the butter until they are all coated. 

Sprinkle the next items over the graham cracker mixture:

  • walnuts
  • chocolate chips
  • white chocolate chips
  • butterscotch chips
  • coconut 

Pour the sweetened condensed milk evenly across the entire pan. 

Bake for 25 minutes and top is golden brown. 

Cool on rack for 2 hours then remove from pan using parchment/foil overhang and cut into bars using a sharp knife.

Tuesday
Jul172012

A Lovely Gift

I am a really lucky girl. Mr. Ramon loves to bring me little gifts when he travels. I like that. It feels nice that he is thinking of me when he is away. 

He just got back from a week long trip to Los Angeles where he was visiting his family. While they were out one day he picked me up a box of French macarons from Bottega Louie. This amazing place is a restaurant, patisserie, gourmet market, cafe and bar. Full of tasty and beautiful things. 

The French macaron is a wonderful cookie. Wikipedia says "A macaron is a sweet meringu-based confectionery made with egg whites, icing sugar, granulated sugar, almond powder and food coloring. The macaron is commonly filled with ganache, buttercream or jam filling sandwiched between two cookies."

The flavors he brought me were - salted caramel, strawberry, violet, pistachio and passion fruit. They were almost to pretty to eat. 

While not something I seek out these were the perfect little treat. They had a crispy outer shell with an airy soft melt in your mouth center. I really loved the salted caramel and the strawberry. 


Friday
Jul062012

Friday Cookie Day - Ghirardelli Chocolate Chip Cookies

Every Friday here at Immortal Dog is "human cookie day". We always have snacks and cookies in the store for the pups I thought what a great way to treat my customers. It has worked so well that some of my customers have decided to shop on Fridays so they can get a cookie. 

Every week I search for a fun new cookie or opt for a classic. This week I went for the classic - Chocolate Chip. I decided to use the recipe off the back of the package of the Ghirardelli Chocolate Chips. When I am picking up chocolate chips I often ponder which brand to use. Do I buy what is on sale? Do I buy what I like? Do I try something new? I opted for the Ghirardelli Bittersweet and Semi Sweet chips last time. They look so much fancier than Toll House just by the way they are packaged. I have really been in to bittersweet the last few months. They give a more "grown up" taste to the cookie. The Ghiradelli Bittersweet chips are also bigger which I like. 

This recipe came right off the back of the bag. I used 1/2 bittersweet and 1/2 semi sweet. I also added over a cup of toasted chopped hazelnuts. 

Chocolate Chip Cookies

Yield: 4 dozen cookies
  • 1/4 cups unsifted flour
  • 1 teaspoon baking soda
  • 1/2 teaspoon salt
  • 1 cup butter softened
  • 3/4 cup sugar
  • 3/4 cup brown sugar, packed
  • 2 large eggs
  • 2 teaspoons vanilla
  • 1 bag Ghirardelli Chips
  • 1 cup nuts chopped (optional)

Heat oven to 375ºF.

Stir flour with baking soda and salt; set aside.

In large mixing bowl, beat butter with sugar and brown sugar at medium speed until creamy and lightened in color.Add vanilla and eggs, one at a time. Mix on low speed until incorporated.

Gradually blend dry mixture into creamed mixture. Stir in chocolate chips and nuts.

Drop by tablespoon onto ungreased cookie sheets. Bake for 9 to 11 minutes or until golden brown.

I have to say that I really liked these cookies and so did my customers. They have a nice brown butter flavor and remained chewy. They are very rich with the chocolate and the hazelnuts. I do think if you are in the mood to make a chocolate chip cookie these are worth trying and go bittersweet!

Note - I talk about/review products I love. I do not receive compensation for any name brand product I mention.