Entries from August 1, 2012 - August 31, 2012

Friday
Aug312012

Tomato Summer Squash Gratin

When planting our first garden together this summer I knew that squash would be easy to grow and provide us with some actual "eating from the garden" satisfaction. I also know that squash can overrun a garden and leave you with piles and piles to work through. 

We decided to plant several summer squash and a early winter squash. We put in Spineless Beauty Zucchini, Yellow Zebra Zucchini and Yellow Crookneck Squash - all organic starts from our local nursery. We have had a nice steady flow of squash this summer and have enjoyed them grilled, in bread and raw in salads. 

I was super excited to grow my own tomatoes but knew I needed to be ready for disappointment if summer just didn't bring enough heat. But the good news is - I can get beautiful local, organic tomatoes at our neighborhood co-op. 

I think the idea of a summer gratin sounds delish. Actually the idea of anything gratin sounds good to me. To "gratin" something means to top it with a browned crust of breadrumbs, grated cheese, and/or butter. In this case I want to take care how I prepare the veges as these two items can get soupy and mushy when cooked due to their high moisture content. But once you have a good technique in place you have a wonderful summer dish that is good fresh out of the over or room temperature. 

Summer Vegetable Gratin 

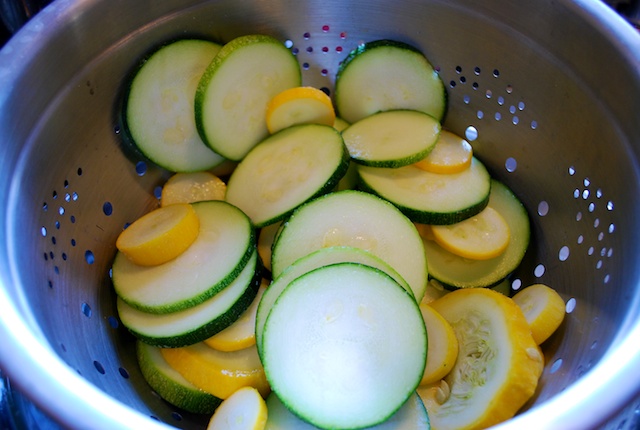
  • 1lb of summer squash sliced into 1/4 inch rounds
  • 1lb of zucchini sliced into 1/4 inch rounds
  • 4 large tomatoes sliced in 1/4 inch slices
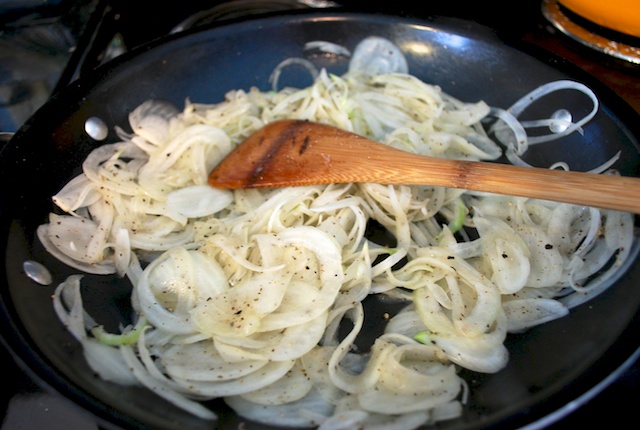
  • 2 onions sliced thin 
  • olive oil
  • 1 tablespoon fresh thyme
  • 2 cloves minced garlic
  • salt/pepper
  • 1 cup bread crumbs fresh or dried
  • 2 shallots minced
  • 1/4 cup grated parmesan cheese

Toss sliced summer squash and zucchini with 1 tablespoon of salt and place in colander to drain. Drain for about 1 hour. Arrange squash and zucchini on a folded kitchen towel or several papertowels, cover with another towel or more papertowels and press to remove any additional liquid. 

Preheat over to 400 degrees. Oil a 13x9 baking dish. 

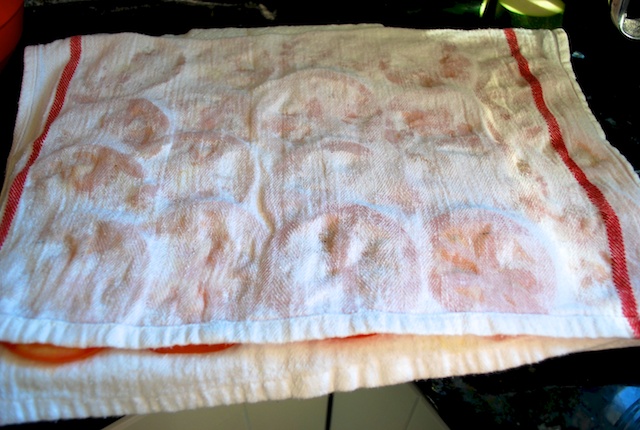
Arrange tomato slices on a kitchen towel or several paper towels. Sprinkle with 1 tablespoon of salt and let stand 30 minutes. 

Preheat a skillet with a tablespoon of olive oil and sautee your onions on medium low heat until they are soft and brown - about 25 minutes. Season with salt and pepper. 

Place another towel or paper towels on top of tomatoes and press to remove liquid. 

In a small bowl combine garlic, 3 tablespoons oil, 1/2 teaspoon pepper, and thyme. In large bowl, toss zucchini and summer squash in half of oil mixture.

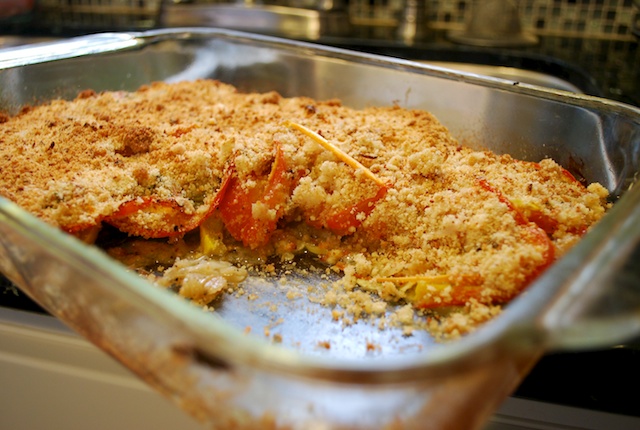
First layer the zucchini and summer squash in the bottom of the 13x9 baking dish. Spread the onions over the squash evenly. Next layer the tomoaotes over the onions overlapping as necessary. Drizzle the rest of the oil mixture over the tomatoes. Bake until tomatoes are brown on the edges and vegetables are soft. About 45 minutes.

In a bowl mix the bread crumbs, shallots, parmesan and salt/pepper to taste. Turn oven broiler on. Sprinkle bread crumb cheese mixture over vegetables and put under broiler until topping is brown and crispy. Remove from oven and let sit 10-15 minutes before serving. 

We enjoyed this with a yummy roast chicken on the patio with some good friends. It was a perfect summer meal!

Wednesday
Aug292012

Pie Contest!

My friends Danielle and Steve hosted a Ping Pong Tournament and Pie Contest this past weekend - what a blast. They live in West Seattle and have a lawn with an amazing view. They provided drinks and we brought our own picnics. What a fun idea. Add in ping pong and pie and the fun is non stop. 

Danielle reached out to me the week before the event to see if I could pull together some signage for the pie table as well as some award ribbons for the top pies. What a cool thing to be asked to do. Of course I said yes even though I knew I had a crazy week ahead of me. I did some research on award ribbons and came up with some ideas for signage based on vintage tablecloths. You can find them here on my Pinterest page. (I love to start a project with a mood board - gather all my inspirations and ideas together).

I had great hopes of folding ribbon perfectly and creating stunning award ribbons. Well that didn't happen. Did I mention I am not really crafty? Armed with a hot glue gun I burnt all my fingers and made a big mess all over my desk but, I finally made it through with some decent results. 

I started with a variety of ribbons and some flat wooden circles from the wood craft area in Michaels. I painted the circles yellow for this project to match the ribbon (these have holes like buttons in them - but I am covering them up with the award name so they work perfectly).

For each award I cut out lengths of ribbon then glue gunned them on individually. Many of the awards I looked at were made with one long length of ribbon folded and attached. I could not quite manage that and have it look as good as I wanted. I then glued on the tail ribbon to the back. I experimented with different combinations and came up with some pretty cute ribbons. 

The other pieces I worked on were the signage for the table, judges and winners of the contest. I printed them on card stock so they would be stiff enough to stand up. 

The funny thing that day was that I was so excited about the event that once I got there I forgot to take any pictures of the pie table all set up . I also did not take one single picture of the pie I baked - which to my surprise won first place. I really could have kicked myself. 

Wednesday
Aug222012

The Dress

I have been collecting pictures of wedding dresses since I was a little girl. It was fun to look back over them and see what I had imagined myself in. 

I was having quite a dilemma. The thought of wearing a white dress was so frightening. Heck, I don't even own white underwear. So how was I supposed to feel comfortable in something that reminds me of a huge white marshmallow? On the other hand, formal colored dresses felt very "prom" like to me. I wanted something elegant, colored and in my budget. 

Around the time Mr. Ramon and I were engaged we were in Portland shopping, eating and hanging out. We were on the hip Mississippi Ave. and went into a shop called Flutter. We were searching for wedding props - but I always peruse the vintage clothing. I was immediately drawn to a rack of amazing gowns. Now it is hard to explain what I was seeing - but dresses made of tulle, sequins and satin. All looking quite disheveled in a beautiful way. I knew instantly that this was the look I wanted. The big sign above the dresses said "Urchin Re.Design". I took note and knew I needed to find the person that made these and see if they could make me a dress. 

I could not let this leave my mind and upon returning to Seattle emailed Sonia Kasparian at Urchin to see if she could make me a dress. I was sure that this type of service would be out of my budget. After a few emails back and forth we decided to meet at her studio for a consultation. 

To start off I needed to know what style of dress would work best on my figure. I enlisted a bunch of my favorite ladies and my mom to head to David's Bridal to try on dresses for shape only. Exactly as I expected - the experience was really tough on me. Trying on huge white dresses in front of 100 mirrors was a bit scary. But I narrowed it down to empire waist and a fuller skirt. I had pictures and ideas to take to my first meeting with Sonia. The consultation with her was the beginning of what was to be 6 months of back and forth trips to Portland for custom fittings and great conversations. Not to mention she was able to make me my dream dress within my meager budget.

Sonia is unbelievably talented. She makes new dresses out of recycled dresses, tablecloths, vintage fabric etc. She hand dyes, hand embellishes and builds you a custom dress that is one of a kind. She has a house stuffed with fabric, leather, feathers, jewelry, beads and embellishments of all kinds. She also makes veils, headpieces, shrugs, jackets and on and on and on. She made me feel like the most beautiful version of me on my wedding day

Here is an example of her work - another bridal commission. 

Here are some pictures of my dress. Black was not my original intention. We talked about a lavender underskirt and a darker tulle. At our next few meetings the color changed and we moved to black as the top layers. She also found this exquisite French black lace with sequins that she hand sewed to the empire waist and on the bodice. I made quite a few trips as the entire top was fit directly to me. She also made me a shrug out of an old sweater and the same lace on the dress.

Let me tell you I felt like a princess during this process. I also loved that no one knew anything about my dress. I went alone on Mondays to my appointments. I even tried to keep Mr. Ramon in the dark about what I was doing. The night of our wedding I found out he really believed me that I was wearing white and when I came down the stairs in my dress he was in awe. 

Overall - hands down the most amazing experience ever. 

This year Vera Wang and a handful of other designers showed colored wedding dress collections. I think this is a really awesome trend and when done well is so beautiful. 

Tuesday
Aug212012

Raw Garden Salad


The best thing about growing your own food is eating it! With this warm weather I swear I can see my zucchini grow. Wanting to stay ahead of the squash downpour about to happen I made Mr. Ramon a raw garden salad for work this week. It was really cool to be able to pull a few of our vegetables together to make this tasty salad. This salad is easy and fresh and crunchy. You can add almost any vegetable you have growing in your garden. 

Open, drain and rinse 2 cans of Cannellini Beans - place in medium bowl

Slice 2 small zucchinis lengthways into 4 pieces then chop into thin bites - place in bowl with beans

Slice three handfuls of green beans on the diagonal - add to bowl 


In a small separate bowl mix well- 

  • 2 tablespoons olive oil
  • juice of 1 lemon
  • salt and pepper to taste 
  • 1 tablespoon chopped fresh basil

Pour over vegetables and mix until coated. I like to top the salad with crumbled feta cheese. This salad is even better the next day. 

Enjoy!!

Thursday
Aug162012

Cantaloupe Aguas Frescas

Today it is going to reach 90 degrees in Seattle and here that is hot! Looking for foods to cool us down, I saw a very ripe cantaloupe in the refrigerator staring at me. I immediately knew that I was going to turn that guy into Aguas Frescas!

Aguas Frescas means "fresh waters" in Spanish and that is just what they are. These refreshing beverages are from seasonal fresh fruit, water and sugar. Traditionally the fruit is hand mashed and mixed with water and sugar until combined. I use a blender to make quick business of it. In this case I also made a fresh mint simple syrup to sweeten it with. Less mixing with no granulated sugar to dissolve and a little hint of mint.

This drink is best served ice cold. Refrain from adding ice as to not dilute it. I love to serve one at a summer party for those looking for alcohol free options. Of course I also think that these make a great base for tequila!! 

Cantaloupe Aquas Frescas

  • 1 cantaloupe peeled, seeded and diced
  • 2 quarts of water - approximately
  • 1/3 cup mint simple syrup (see below)
  • juice of 1 lime 

Place half of the cantaloupe and half of the water into the blender and blend until pureed. Pour into pitcher and repeat with the other half of cantaloupe. 

Add the simple syrup and lime juice and mix well

Chill until very cold!

Drink!

I love simple syrups. So easy - just sugar and water. You can add any herb or flavor to them and use them for iced tea, iced coffee, mixed drinks etc. So easy to make.

Mint Simple Syrup 

  • 1 cup sugar
  • 1 cup water
  • 1 handful of fresh mint

Crush the mint and water together in a small saucepan to release the mint oils. Add the sugar and bring to a boil over high heat. Strain mint leaves from syrup. Remove from heat and let cool before use. Will keep for 2 weeks in the refrigerator.