Entries in Party (3)

Wednesday
Nov212012

Slab Apple Pie

Tomorrow is Thanksgiving and I had planned on a week of great posts on making stock, prime rib, stuffing etc. Instead I took orders from friends for pies and desserts and have been baking my week away. While this baking makes me happy and helps me have some holiday money it also makes me sad I can't squeeze more hours into a day to share all sorts of wonderful things with you. Ahhh life!

I am continuing my love affair with apples - especially apple pie. With Thanksgiving you might be feeding a huge crowd. If so this easy and differant approach to an apple pie might be right up your alley. Slab Apple Pie - sounds like a tasty dessert that resembles concrete. But wait - this slab is flakey, buttery and filled with the pure goodness of apples. There are many variations of slab pie - 2 crust pie, frosted crust pie and this version - the crumb top pie. 

Apple Slab Pie with Crumb Topping

Crust

  • 2 1/4 cups all-purpose flour
  • 3/4 teaspoon salt
  • 2/3 cup cold butter - cut into small pieces
  • 8 – 10 tablespoons cold water
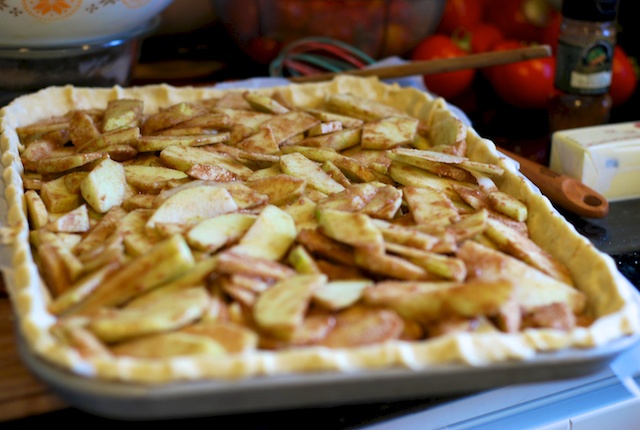
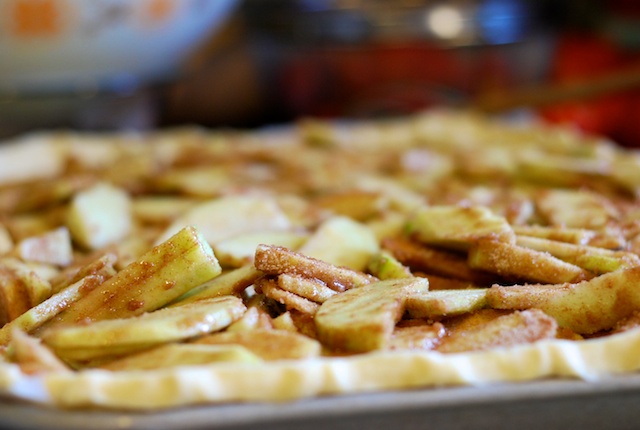
Apple Filling

  • 2/3 cup sugar
  • 1 teaspoon ground cinnamon
  • 3 1/2 pounds Granny Smith Apples, peeled and thinly sliced 
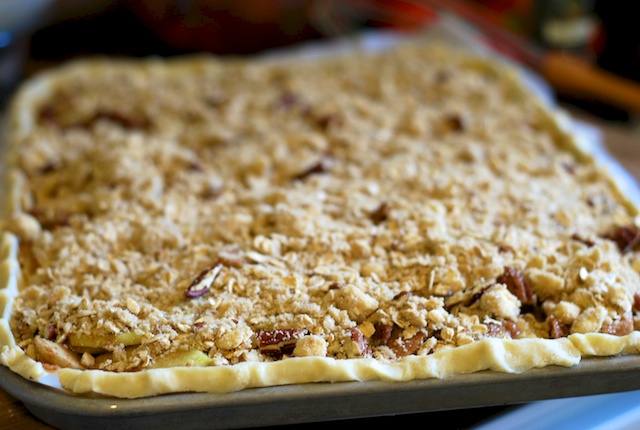
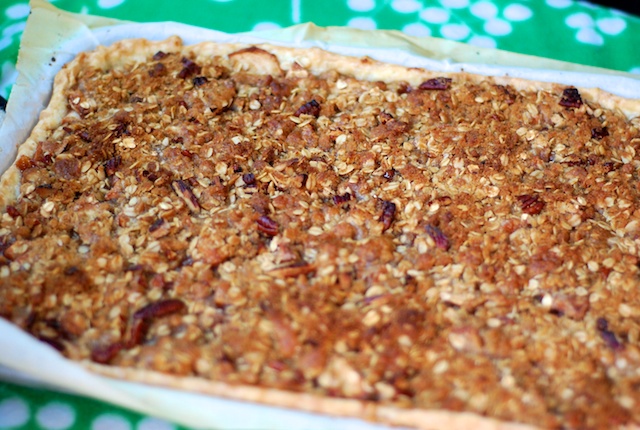
Crumb Topping

  • 1 cup oats
  • 1 cup packed brown sugar
  • 1/2 cup all-purpose flour
  • 1/2 cup cold butter - cut into small pieces
  • 1/2 cup pecans - chopped
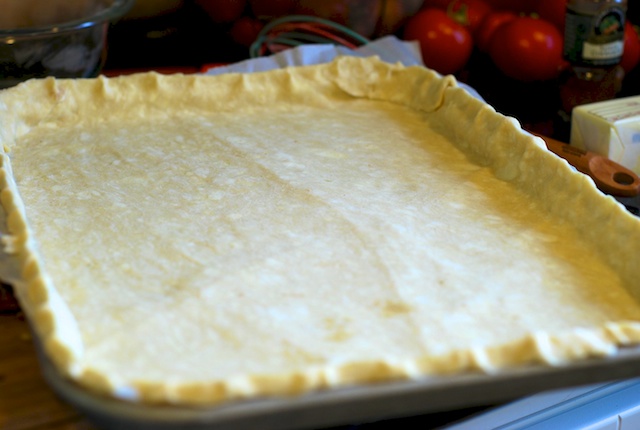
Crust

Combine flour and salt in a large bowl. Using your fingers work butter through flour until the butter is in pea sized amounts and mixture resembles coarse crumbs (or cut in with a pastry blender). Sprinkle water over flour mixture 1 tablespoons at a time; folding and pressing with a spatula until all of the flour mixture is moistened and combined. Press into a disc and wrap with plastic wrap. Chill for 2 hours or overnight. 

Roll out the dough to approximately a 17×12 inch rectangle, on a large piece of lightly floured parchment paper. Transfer to a 15x10x1 inch baking pan. Roll edges under and press down onto the rim of the baking sheet. Trim off excess parchment paper. Chill in refrigerator while you prepare filling.

Apple Filling 

Toss together all ingredients in a large bowl until apples are evenly coated. Pour into dough-lined pan, spreading evenly. Refrigerate while you make the crumb topping.

Crumb Topping 

Stir together oats, brown sugar, and flour until well combined. Using your fingers, cut in the butter until the mixture resembles coarse crumbs. Stir in chopped pecans. Sprinkle evenly over apple filling.

Bake at 375ºF for 45-60 minutes, until filling is bubbly near the centre and crust is browned. Allow to cool slightly before serving.

Keep at room temperature for 24 hours or refrigerate for up to 3 days. 

Makes: 20-25 servings

Friday
Jun252010

sparkly thank you tags

My friend June is having her 40th birthday and to celebrate is having a few friends over for snacks and drinks. I love June a lot - she is an amazing woman. And 40 is a big deal so I wanted to do something a little special and decided to put together a little thank you gift for the ladies coming over.

I decided to do a lemon sugar cookie and wrap them in a little bag with ribbon and a pretty tag - I love tags and anytime I am selling or giving goods I ask Mr. Ramon to print me some tags. With spring/summer finally trying to come to Seattle I thought that a nice robins egg blue would be so pretty.

These are the tags we printed -


Now I know that Martha Stewart does a real good job marketing her products - and making a pretty penny off them - but sometimes I get sucked in. And this glitter was the perfect color. Of course this "glitter glue" is just glue - but I needed some anyway since mine has all dried up.


I punched a hole for the ribbon to go through then made a little border of glue and then added the glitter to it - once it dried I blew off the excess.


Here they are all drying.


I filled my bags with cookies and tied the ribbon on and added the tag - and voila!!

Monday
Apr122010

party flowers

Spring is here in the Pacific North West. Or at least it is attempting to be here between the  hail and sideways rain. But the tulips and blossom trees are pushing forward putting me in the mood for a spring get together.

I sent out invites to a close group of friends for a little gathering of snacks and drinks.

I wanted to make the homestead a little more festive so I decided to attempt to make some of those awesome tissue paper flowers that are featured on almost every party and wedding site.

I found directions on Martha Stewart and they were so easy to make.

Ramon helped out and ironed to tissue paper for me - we used 8 sheets for nice fullness - I would like to try with more and see how it comes out.

I worked on the accordion folding and cutting the ends to create the petals and then secured them with florists wire - then we separated the layers

The tricky part is to fluff the layers and create seamless balls so you cannot see where the two sides meet.

Ramon hung them from the ceiling while I art directed the installment - overall they looked really good and people who came over thought they were pretty and were surprised I made them. Which either means I don't look like the crafty type or they looked real good!

As I am also wedding planning I thought these might be good in newspaper for a more rustic flower look - they also would be quite smashing in black tissue and a pop of green.