
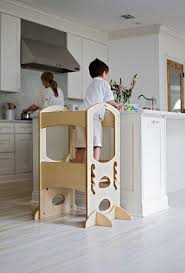
Learning Tower
Ever since Lady Paloma was born, I looked eagerly ahead to when she would be able to help me in the kitchen. From my good friend Rachel I learned about Montessori Learning Towers and why they are a great choice for babes entering the Practical Life stage. Stool and chairs can be dangerous to balance on. One misstep and a fall can easily happen. Also - getting up on stools and chairs requires assistance, taking away the independence a child has in a Montessori environment.
A Learning Tower is a safe way for a child to be at counter height practicing real life skills with safety and balance. When looking at my options for a Learning Tower many of these started at the $200 mark. Beautiful and everything I wanted but way out of our budget!!
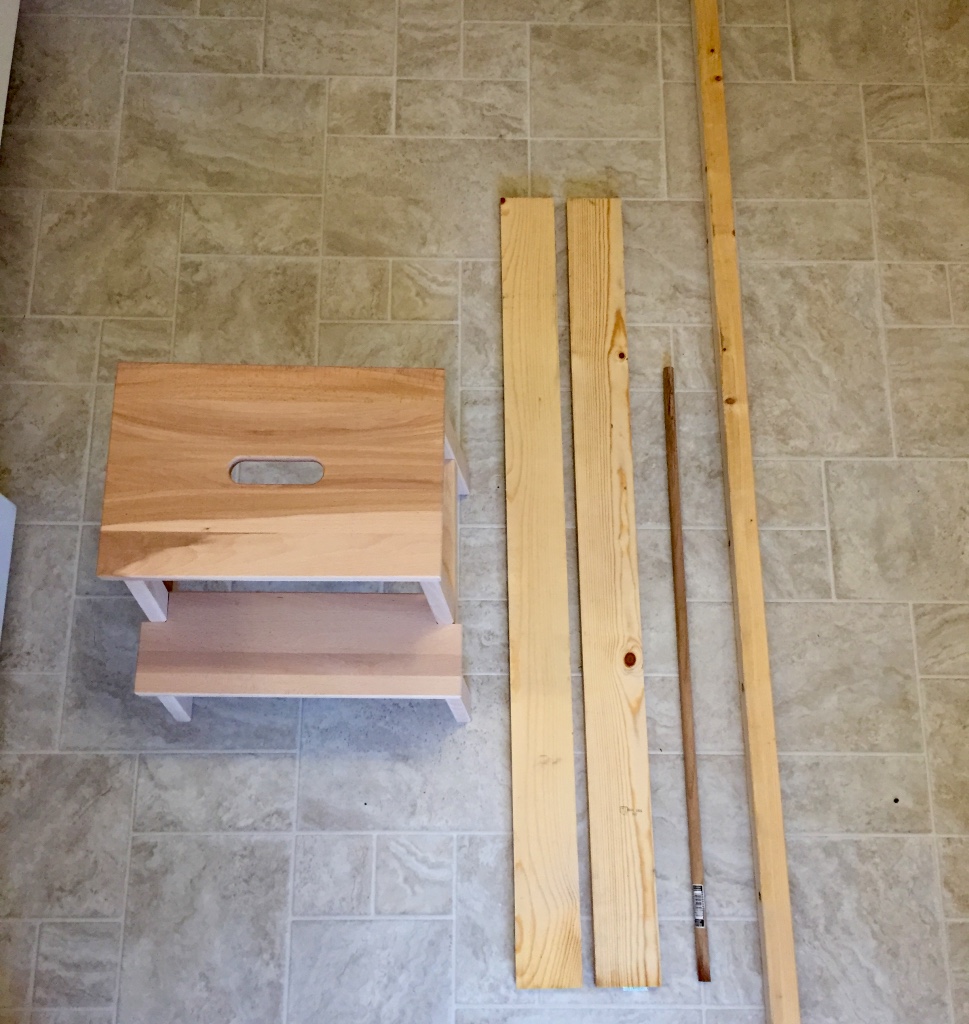
A little more looking around the World Wide Web and we found an amazing Ikea Hack for a learning tower on this blog - What the Vita. The bright yellow they painted their Learning Tower caught my eye. It is a fairly easy project which we did with a hand saw, a power drill and a paintbrush. If you had an electric saw things would move quicker and be a bit more accurate I believe. This could easily be completed on a weekend.
The base of this project is the Bekväm Stool from Ikea. At $14.99 its a steal. The natural color is what we used as I was going to paint the entire thing after it was together. Then a trip to Lowes. We picked up a long 2x2 square board, a 1x4 and a 5/8 dowel. I used some wood putty to fill in the screws and sanded them smooth. Also you need some wood screws and medium grit sandpaper to smooth things out. To paint I used a basic wood primer and chose a lovely color and a sample size of paint was perfect for 2 coats. I also added felt pad to the bottom of the feet to protect the kitchen floor.
For tools you will need a tape measure, a saw to cut the boards and a power drill to put the dowel hole in (5/8) as well as screw it together.
The first step is to put the all stool together except the top step. You will attach the top guard rails to this step first.
Next you cut 4 of the 2x2 boards in a length from the top of the stool to the height of your counter. This will be slightly different for everyone. Then screw each of these on to the corners of the top step.
You will want to then cut 2 2x2 lengths to fit between the right and left side rails about half way down. These get screwed in on each side.
Next - drill horizontal holes across the back two posts for the dowel to fit through. Cut the dowel so it is even across the entire tower.
The remaining cuts are the 1x4. We used one across the front of the tower rails at the same height as the 2x2 and then cut 3 to make the rail across the top edge. The side rails will cover the dowel holding it in place.
Finally - fill the holes, sand everything smooth and hit it with a coat of primer and 2 of paint. I let it dry for 4 days with no use to really get it dry. Then I added the felt feet.
Take a look below and see how ours came together.
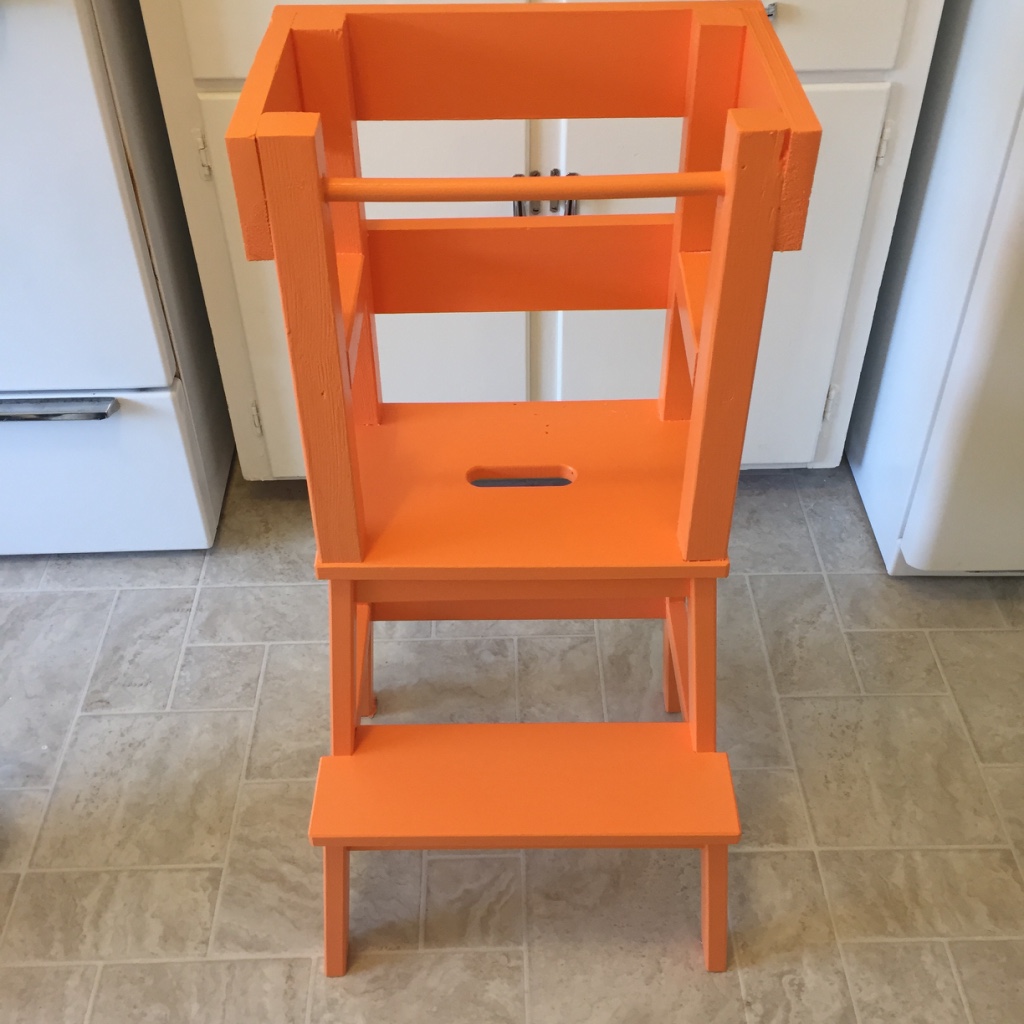
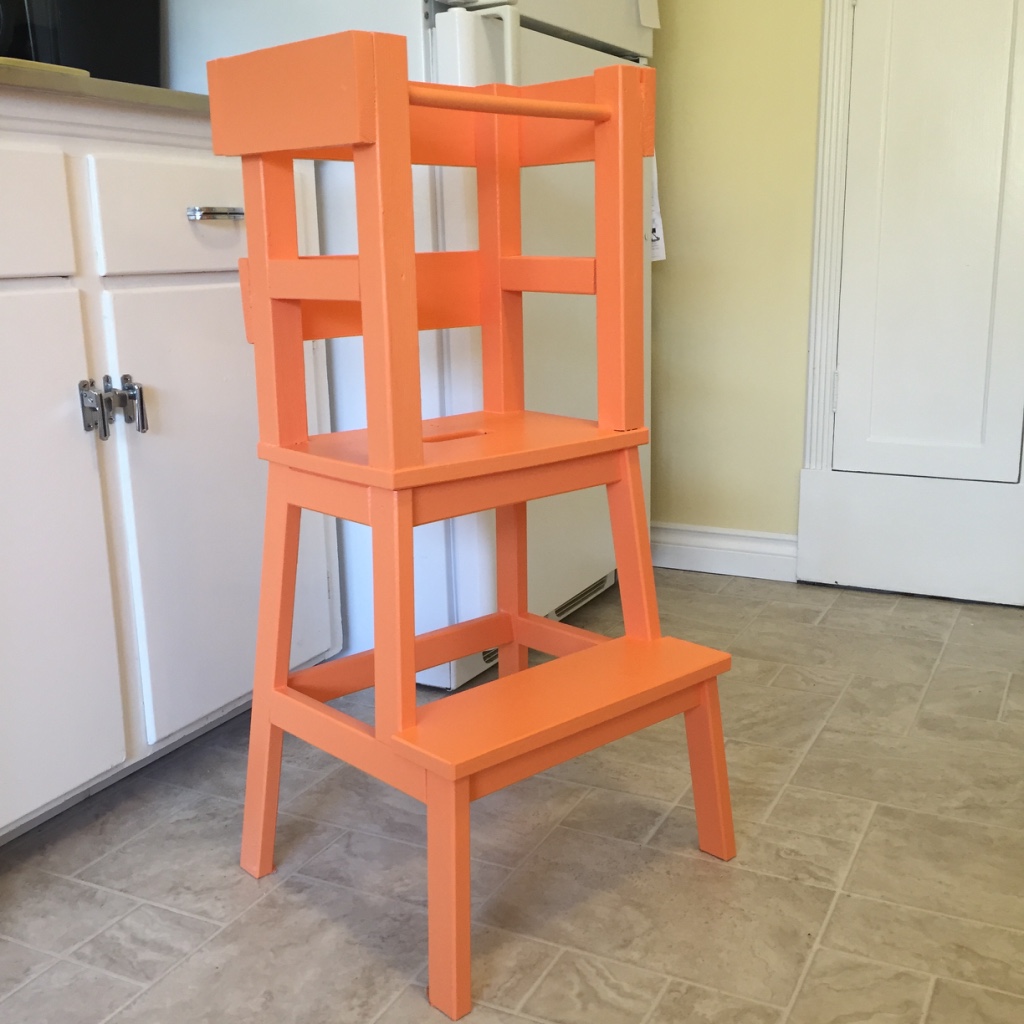
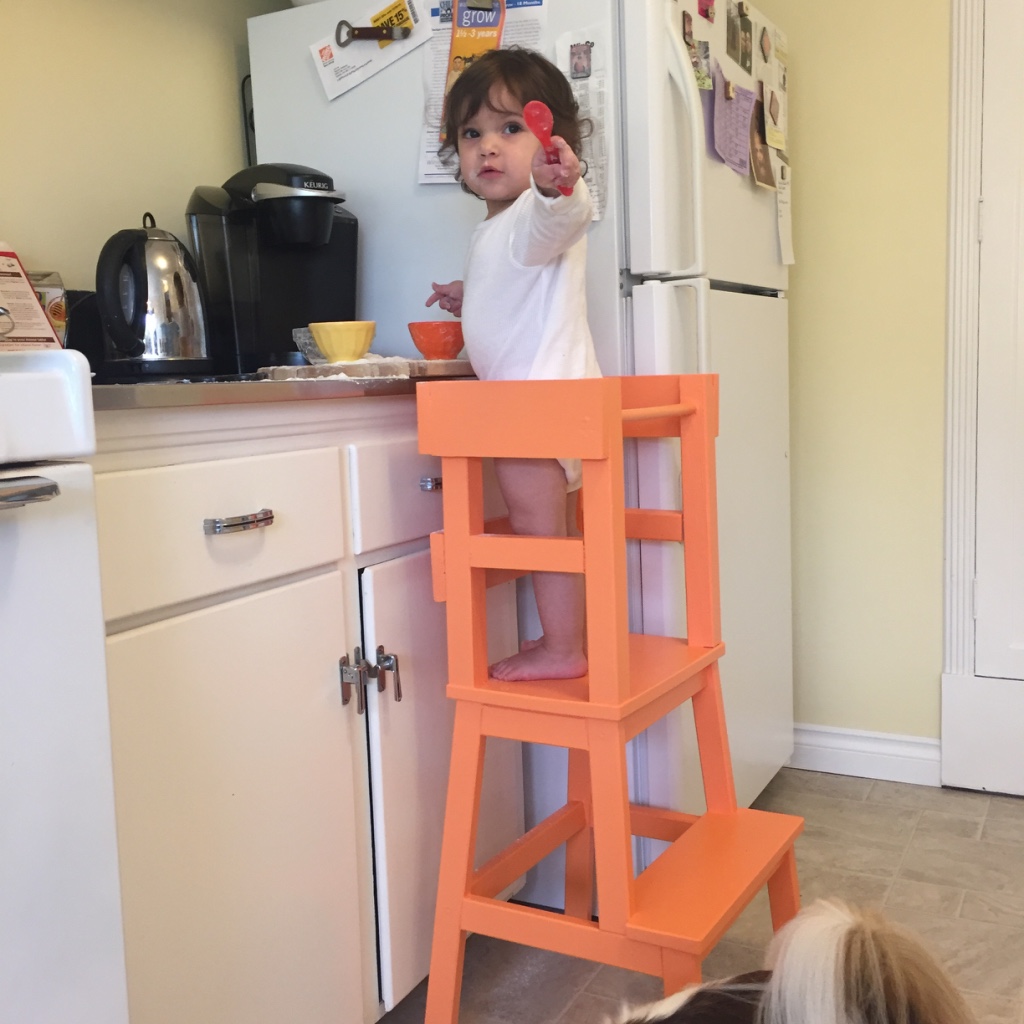
I was super excited about the color. A sort of creamy tangerine. The kitchen is yellow and white with a lot of light in the windows and this color is so pretty in this room.
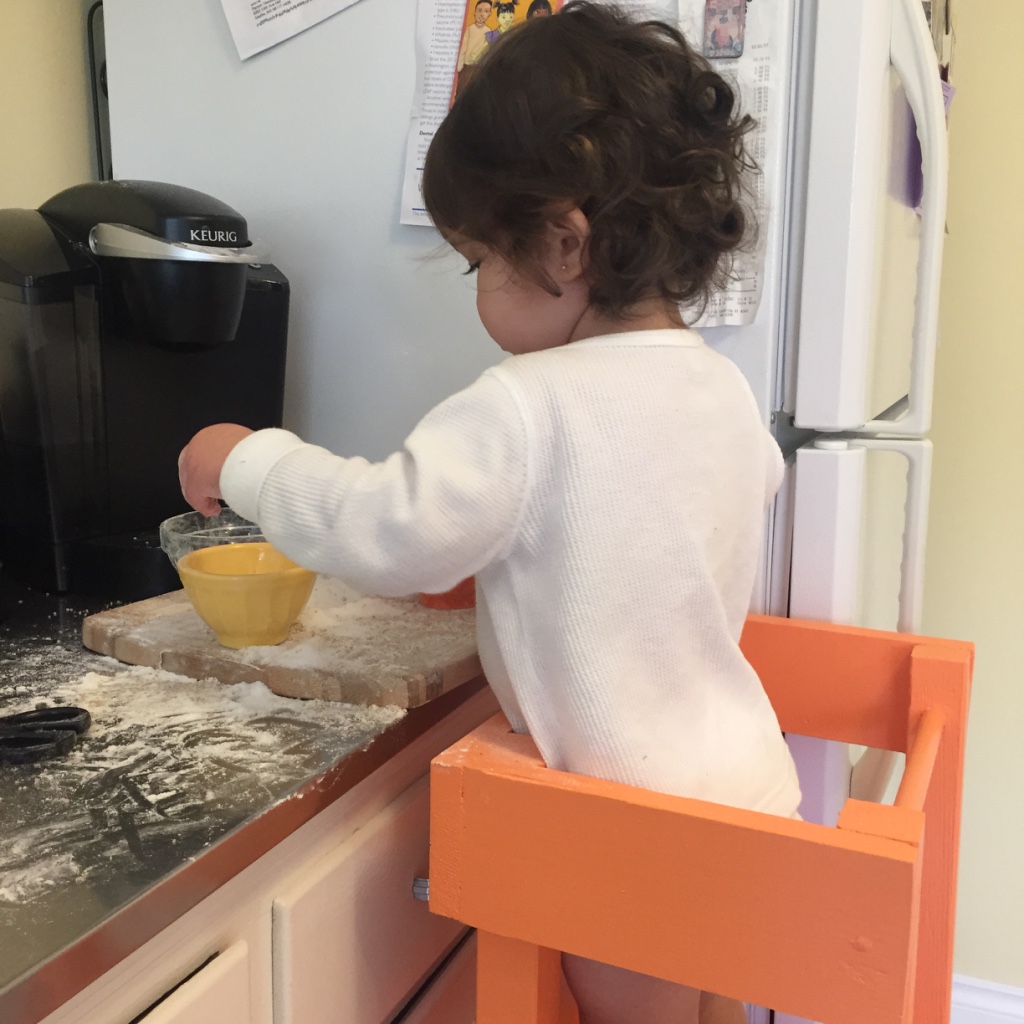
Lady loves it!! She said "wow" when she saw it and once she knew what it was for cant stop asking "up up" whenever she is in the kitchen. She is still figuring out how to get in and out by herself. She heled me bake the other day for over an hour. I gave her a few little bowls and some flour and spoons. Happy as can be.
This is a simple, fun project that can make your kitchen or work space super safe for your toddler! I hope you get a chance to put one together.
Just remember "Small hands can!".
 Post a Comment