Entries in Baby (11)

Tuesday
Oct272015

Learning Tower 

Ever since Lady Paloma was born, I looked eagerly ahead to when she would be able to help me in the kitchen. From my good friend Rachel I learned about Montessori Learning Towers and why they are a great choice for babes entering the Practical Life stage. Stool and chairs can be dangerous to balance on. One misstep and a fall can easily happen. Also - getting up on stools and chairs requires assistance, taking away the independence a child has in a Montessori environment.

A Learning Tower is a safe way for a child to be at counter height practicing real life skills with safety and balance. When looking at my options for a Learning Tower many of these started at the $200 mark. Beautiful and everything I wanted but way out of our budget!!
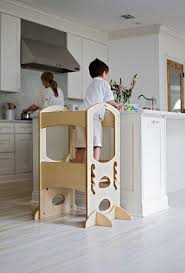
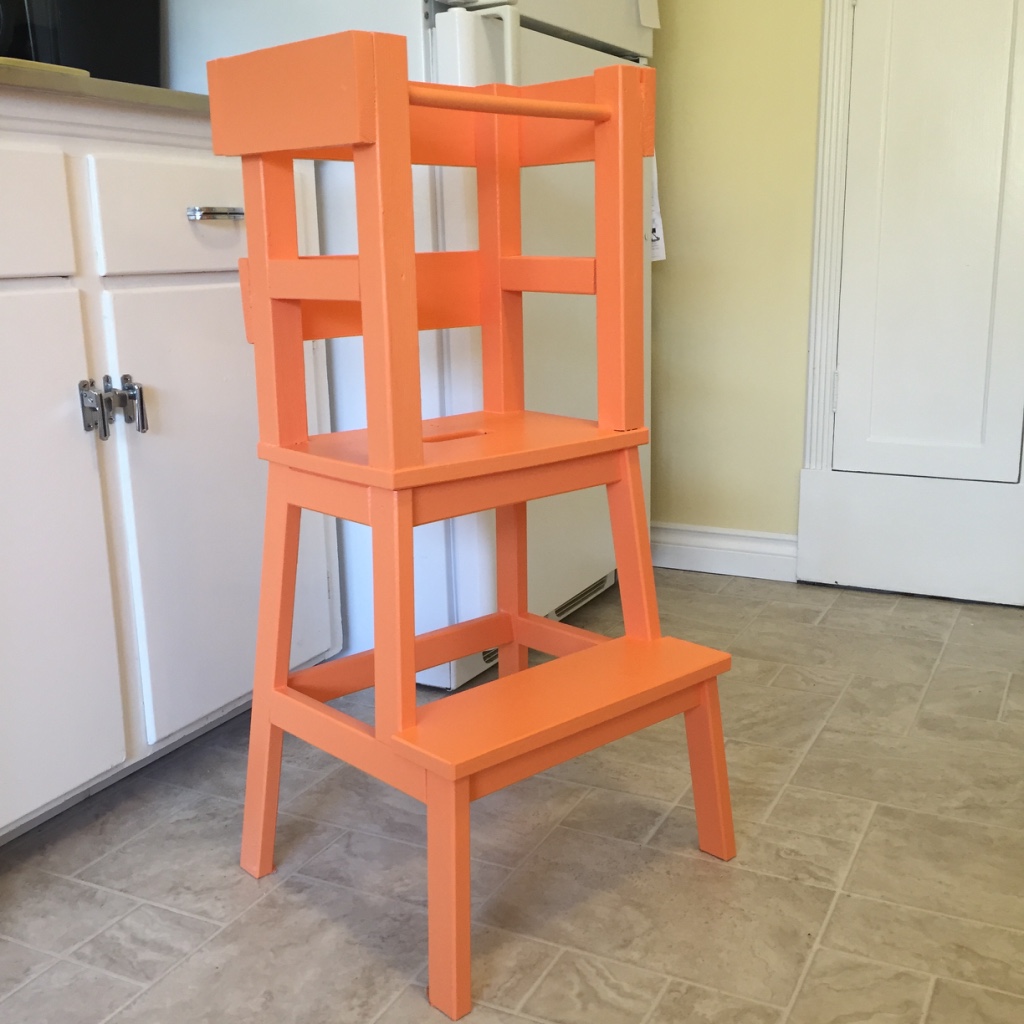
A little more looking around the World Wide Web and we found an amazing Ikea Hack for a learning tower on this blog - What the Vita. The bright yellow they painted their Learning Tower caught my eye. It is a fairly easy project which we did with a hand saw, a power drill and a paintbrush. If you had an electric saw things would move quicker and be a bit more accurate I believe. This could easily be completed on a weekend. 

The base of this project is the Bekväm Stool from Ikea. At $14.99 its a steal. The natural color is what we used as I was going to paint the entire thing after it was together. Then a trip to Lowes. We picked up a long 2x2 square board, a 1x4 and a 5/8 dowel. I used some wood putty to fill in the screws and sanded them smooth. Also you need some wood screws and medium grit sandpaper to smooth things out. To paint I used a basic wood primer and chose a lovely color and a sample size of paint was perfect for 2 coats. I also added felt pad to the bottom of the feet to protect the kitchen floor. 

For tools you will need a tape measure, a saw to cut the boards and a power drill to put the dowel hole in (5/8) as well as screw it together. 
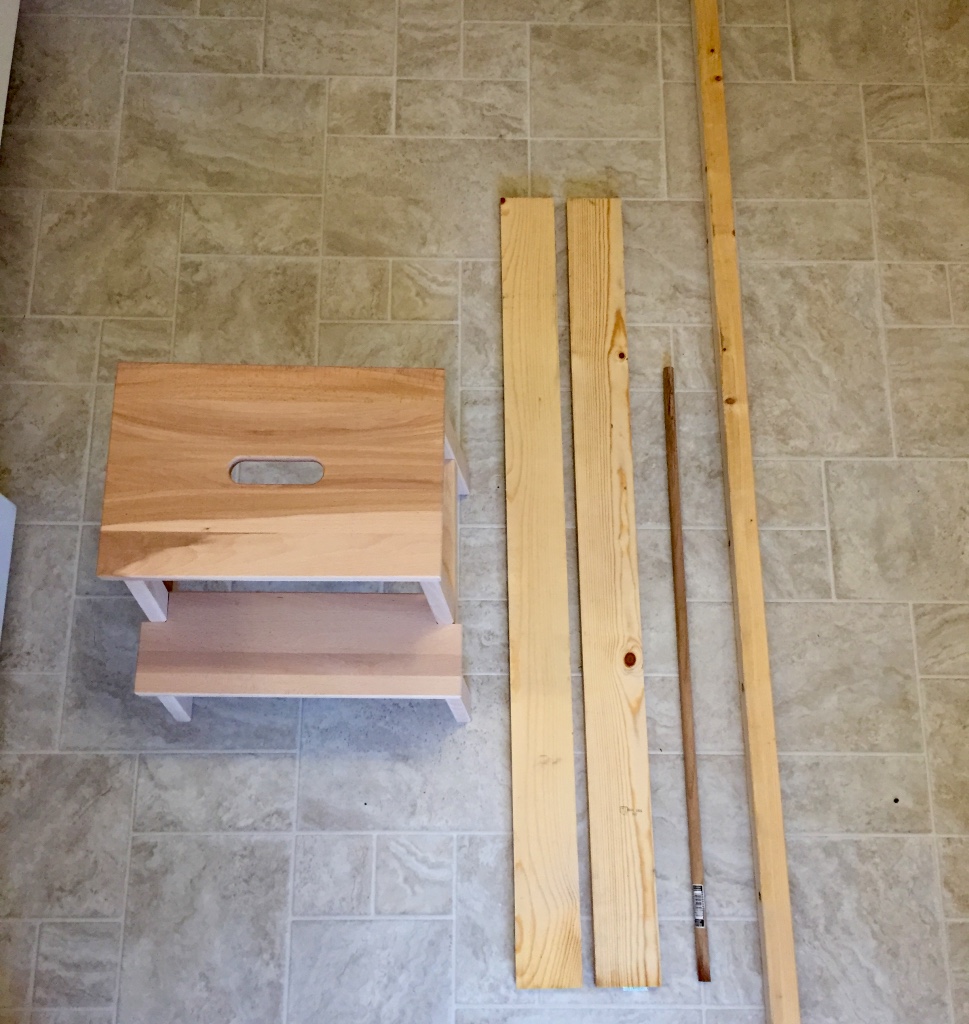
The first step is to put the all stool together except the top step. You will attach the top guard rails to this step first. 

Next you cut 4 of the 2x2 boards in a length from the top of the stool to the height of your counter. This will be slightly different for everyone. Then screw each of these on to the corners of the top step. 

You will want to then cut 2 2x2 lengths to fit between the right and left side rails about half way down. These get screwed in on each side. 

Next - drill horizontal holes across the back two posts for the dowel to fit through. Cut the dowel so it is even across the entire tower. 

The remaining cuts are the 1x4. We used one across the front of the tower rails at the same height as the 2x2 and then cut 3 to make the rail across the top edge. The side rails will cover the dowel holding it in place. 

Finally - fill the holes, sand everything smooth and hit it with a coat of primer and 2 of paint. I let it dry for 4 days with no use to really get it dry. Then I added the felt feet. 

Take a look below and see how ours came together.
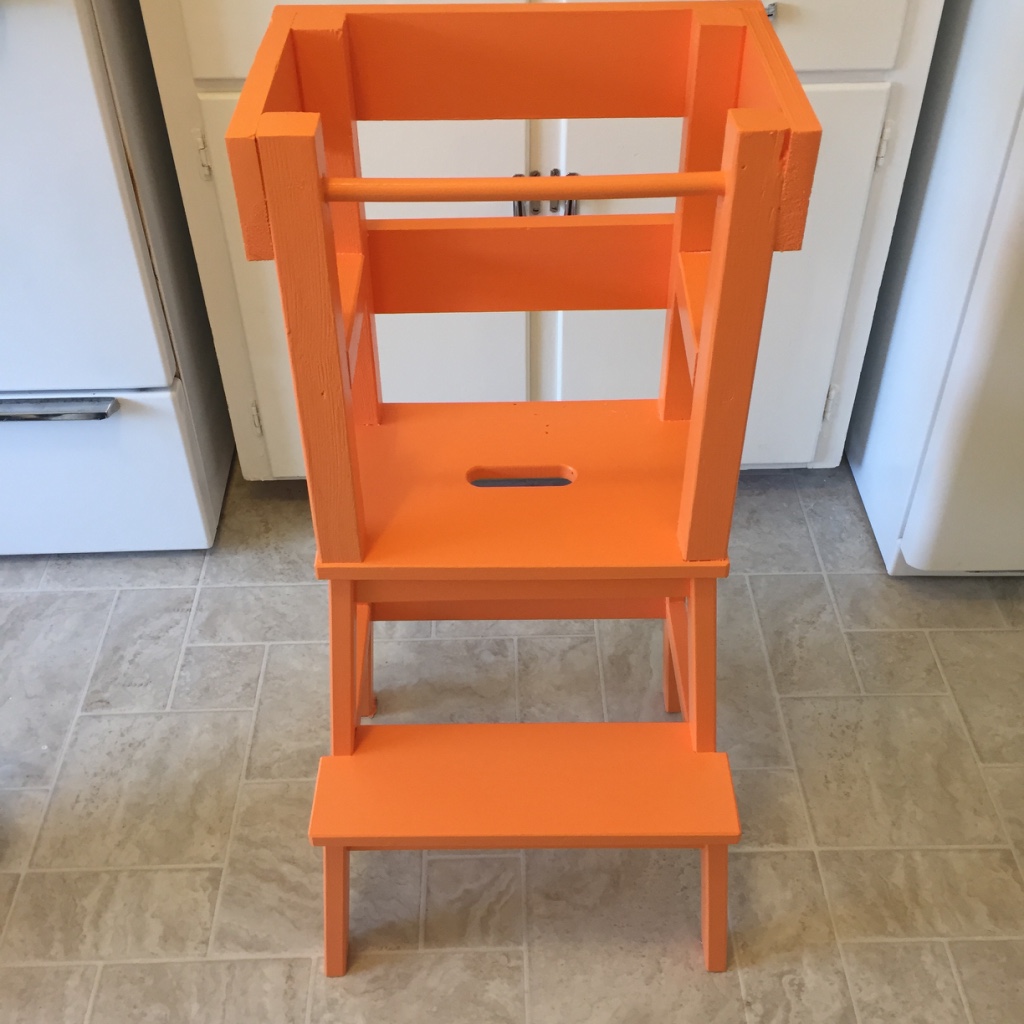
I was super excited about the color. A sort of creamy tangerine. The kitchen is yellow and white with a lot of light in the windows and this color is so pretty in this room. 

Lady loves it!! She said "wow" when she saw it and once she knew what it was for cant stop asking "up up" whenever she is in the kitchen. She is still figuring out how to get in and out by herself. She heled me bake the other day for over an hour. I gave her a few little bowls and some flour and spoons. Happy as can be.
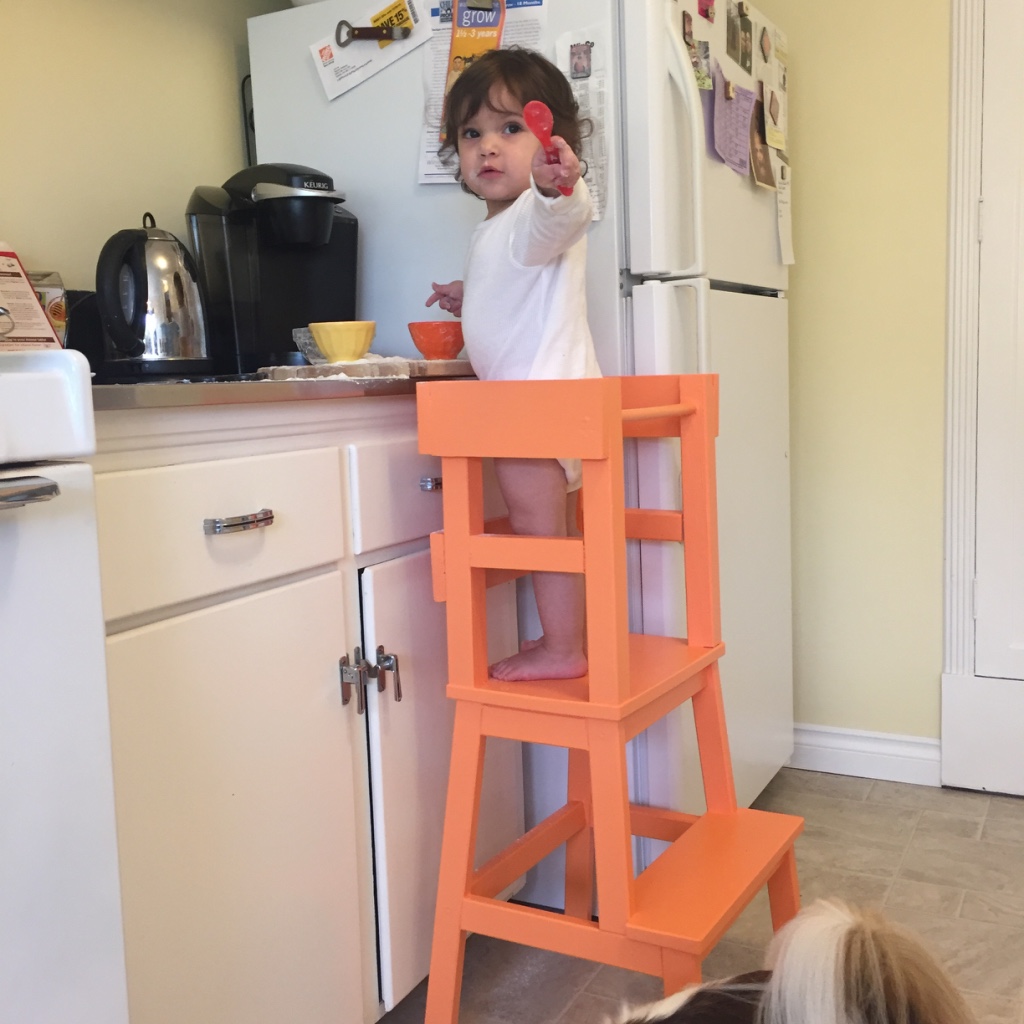
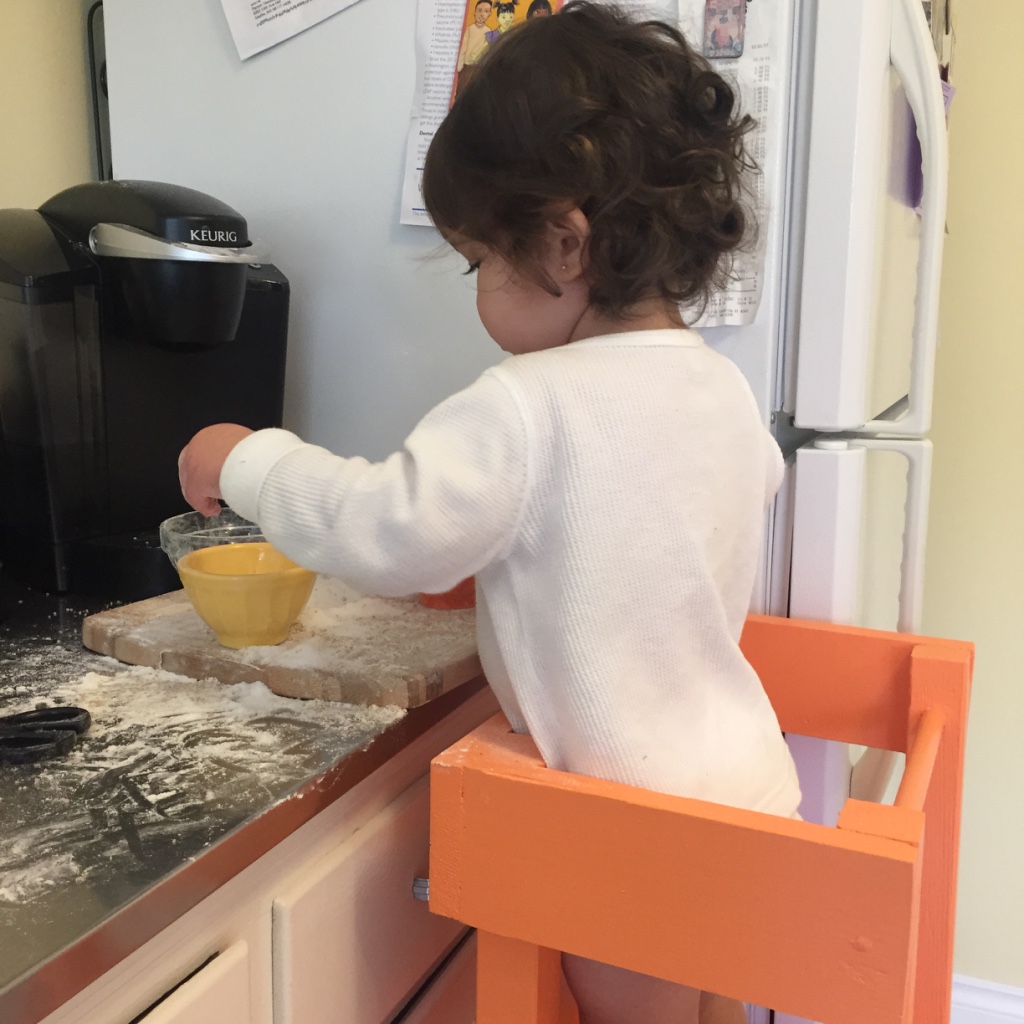
This is a simple, fun project that can make your kitchen or work space super safe for your toddler! I hope you get a chance to put one together. 

Just remember "Small hands can!".

Thursday
Jul242014

Life without an infant car seat

We have all seen them - cumbersome plastic buckets being lugged around by new parents, containing a well protected newborn. This is the infant car seat a device that doubles as a carrier. A modern day convenience. You can easily transport your baby to and from the car without waking them or having to hold them while trying to manage all the other baby gear you brought with you. They also snap into specially made strollers to provide you with an easy transportation option. Just click and go. Sounds like the best invention ever. Or is it. 

Sure I love convenience. It can make life so much easier. But I believe it can also be a crutch sometimes. 

Infants usually sleep well in the car - the road noise and motion lulling them to sleep. Then snug in their bucket they continue to snooze. This allows the parents to carry them in and place them on the floor or a chair at a restaurant and have an evening out without having to hold or manage their baby. I even had friends "baby sit" an infant of friends once that arrived asleep in its infant car seat. This baby slept the entire time they were "baby sitting" and so stayed in the car seat that evening. How great to have a device that keeps your baby comfy while you enjoy life. 

When Mr. Ramon and I were going through the list of "gear" that is recommended for babies car seats were at the top of the list. The first thing we needed to consider was my car. I drive a Mini Cooper. Super small car. I scoured the Mini Cooper forums looking for the car seat options that worked well in the Mini. There were several great options and even a couple infant car seats that fit in - barely. Most of the infant car seats had to be taken in and out of the car through the rear hatch - super inconvenient. This opened the conversation about starting with a convertible car seat and bypassing the infant car seat completely. 

There were some other things to consider when making the decision. One was that we would have to invest in a new car seat when baby out grew her infant seat. This could be somewhere between 6-24 months depending on which brand of seat we chose and her rate of growth. The biggest factor for me when deciding to skip the infant car seat was the carrying around baby in a bucket - not interacting with her - not holding her and letting others hold her. 

We were called crazy by a few parents - what? You are going to wake her up every time you take her out of the car. What will you do if she is sleeping? How will you go out to dinner or social gatherings? Even Mr. Ramon asked "What do we do at a restaurant?". I honestly was amazed. I have to look back at my baby days and wonder how my parents managed to have a great social life and take me everywhere they went without this device. Maybe they just held me. Crazy - but that's what arms are for I think. Especially when there is a baby - who doesn't want to hold a baby. 

Then I have to believe that being in a car seat in this position for hours at a time cannot be good for an infants body. I know that if I sit in one position for long periods I get uncomfortable. And when it comes to sleeping is this the best position for a baby? 

We knew we were going to do a lot of baby wearing when we were out and about. Research has shown how baby wearing is one of the best things you can do for your baby. Benefits of being able to connect at a deeper level with your baby, proper spine and body alignment when worn correctly and a baby that cries and fusses less. These are some fantastic benefits.  

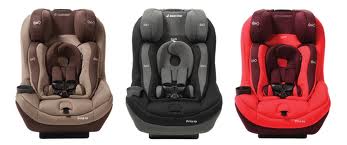
We chose the Ergo carrier for our out and about baby wearing and the Moby Wrap for me to use mostly at home. For the car seat we chose the Maxi-Cosi Pria 70 with Tiny Fit

The Maxi-Cosi is super safe and really compact for the type of seat it is. It fit great in the Mini Cooper. It fit her from the very beginning at 7.5lbs and will continue to fit her until she is 70lb. The Tiny Fit feature is for babies 4- 22lbs is what makes this carseat have a smaller footprint than most infant seats allowing for the front passenger to have more legroom.  

We are now 17 weeks into our new baby life and have managed to make it through with our convertible car seat. We have been out to numerous restaurants, shopping trips and events all without an infant car seat. We have baby carried her when walking around and when sitting have mostly held her in our lap. She has seemed to enjoy being in the action from the beginning - checking out all that these environments have to offer. 

Of course eating one handed is a skill to acquire and Mr. Ramon and I have supported each other during meals. We switch off with her sometimes or cut up one another's food. Teamwork for sure. 

Friends have loved meeting her and holding her while out as well. If she is tired she can fall asleep in arms or we baby wear her. Usually we try to respect her sleep needs and be home during those times - choosing to go out when it works best for her. 

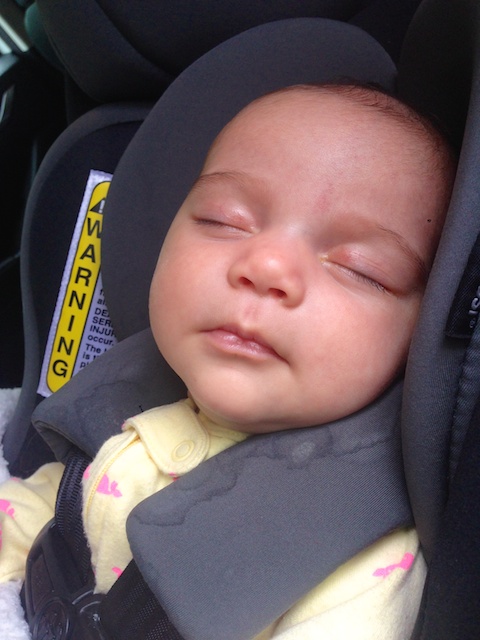
There are times where she falls asleep in her car seat. Of course - the car seems to be her drug. Lulling her into a deep sleep we could only dream of at home. Sometimes we just have to run a few errands and she has to get in and out of her seat. She handles this well most of the time and I like to believe this helps her learn to be adaptable. If she is asleep when we get home I hope Mr. Ramon is around - he is a magician and can move her out of her seat and into the house to continue napping without a fuss on most occasions. 

So this is the path we chose for our babe and everyone has the right to choose what works for them. But I also say - do your research. What is best for the child? I would rather be a little inconvenienced if necessary to make the best decision for my child's best development. 

Thursday
Jun262014

Baby Wipe Solution

There are a lot of baby wipe options out there. We went with cloth re-useable wipes for our home. We have been diapering baby with cloth diapers since 2 weeks old. Along with cloth diapers we are using the cloth wipes I made before baby was born. I love the flannel fabric I made them from so soft. I also double sided them so they are thick and don't bunch up in your hand like the single ply cloth wipes can. 

There are several ways to moisten your wipes for use and many options of what to wet them with. Some people like to keep their wipes dry and moisten them with a small spray bottle as needed during changing the baby. I just imagined a disaster - a squirt bottle in the dark, during a diaper change. 

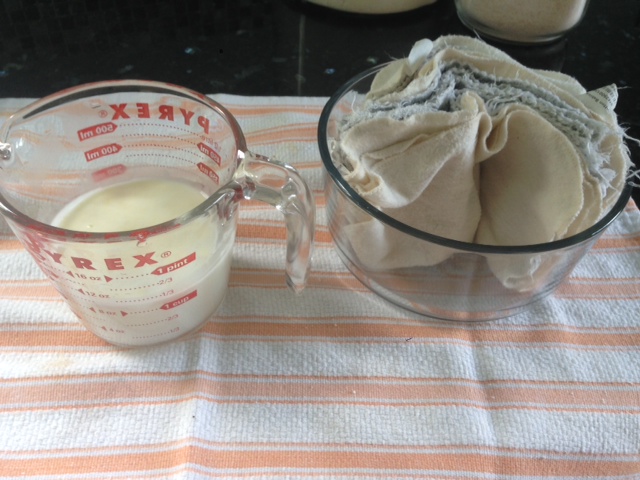
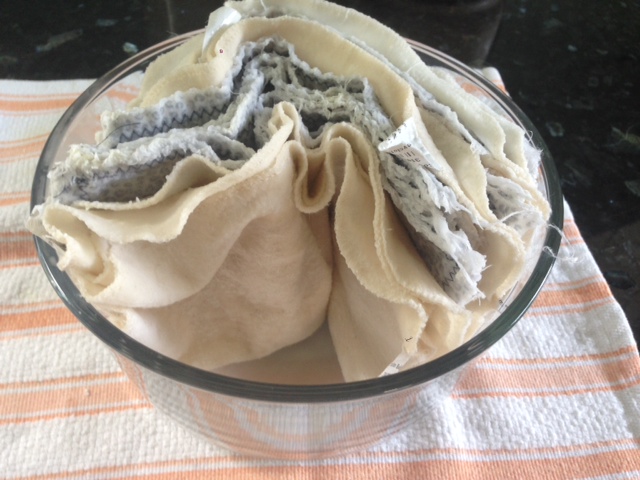
You can also pre moisten wipes and store them in a container near the changing area. This is the method we went with. I wash them with the diapers and take them out of the washer wet - no need to dry them if I am just going to moisten them. I fold them in half and stack them to get them ready to soak in wipe solution. 

When it comes to solutions there are many recipes out on the world wide web. Many of them contain essential oils. Some babies are sensitive to oils - so be cautious when making your own wipe solution. Your baby's skin does not really need many ingredients to clean it. In fact - many people just use water and during a really rough patch of diaper rash I switched to water and it works really well. 

I decided to go with Baby Wipe Juice. One bottle makes 2 gallons, it is organic and full of beautiful ingredients like aloe, lavendar and olive oil.

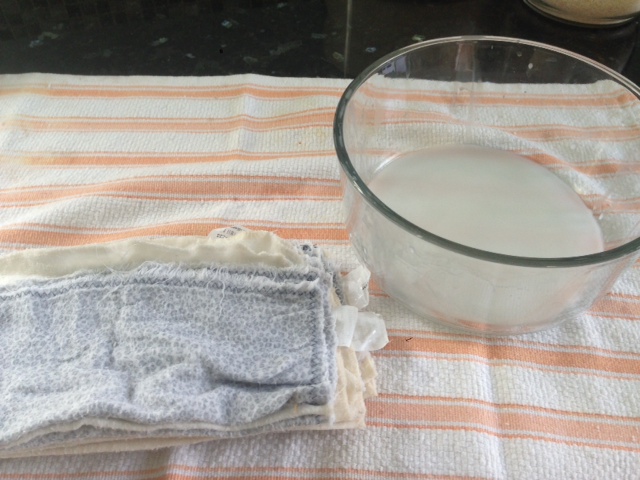
To get my wipes ready for use - I take one cup of water with a couple of teaspoons of wipe juice and stir together. I place my wipes in a bowl and pour the wipe juice water mixture over the wipes. I then squeeze them together to make sure they are all saturated. 

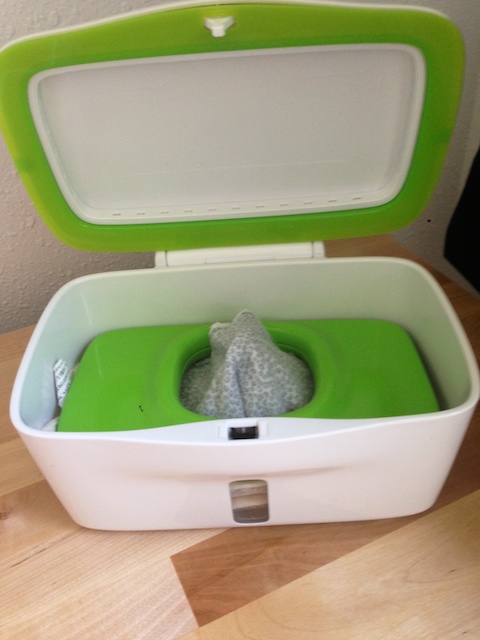
To make sure they stay fresh I only prepare enough for a couple of days and store them in this awesome wipe holder. The Perfect Pull Wipe Dispenser holds traditional wipes as well as cloth wipes. It seals nicely when closed to keep wipes moist and has a weighted plate to hold wipes in place when you pull one up. It also has rubber feet to keep it from sliding around when you pull up a wipe. 

Wether you make them yourself or buy them pre made, I really encourage you to switch to cloth wipes. So nice for your little ones skin and so much less waste. 

Wednesday
Jun042014

Introducing Lady Paloma


Amazing to look and see that my last post was 2 months ago. It seems like time has flown by. The last few weeks of my pregnancy I really started nesting and preparing our home for the arrival of baby girl. My actual due date was April 8 so I wanted to make sure all of my "to do" items were checked off in plenty of time. 

My due date came and went and at 41 weeks and 1 day my labor began. As the day and my contractions progressed I finished up preparations around the house for our home birth. I baked a yummy Apple Cake for our birth team and Mr. Ramon and I made a baked pasta dish for everyone to enjoy once baby had arrived. The labor tub team arrived and filled our tub in the living room. 

About midnight our doula, Brenda arrived. My contractions were about 6 minutes apart and strong. About this time I started to not remember the details of my labor. I was working hard. When my midwife arrived about 2am she confirmed I was headed toward the arrival of baby girl. I spent the night laboring hard - doing stair lunges and other positions to try and get baby girl to move down into position. 

Thursday morning - Mr. Ramon, Brenda and I walked the neighborhood and did lunges up a hill. I labored some in the birth tub, more lunges and tough positions to move baby. She seemed super content to hang out where she was even though my body and the entire house were ready to greet her. My contractions were slower and less intense - my body seemed to know that baby was in no hurry to arrive. My midwives pulled some tricks out of their tool bag and got my labor started up again - we wanted to get things moving to see if we could get baby girl to come on down! 

Thursday night - whew. My midwives and I had the big talk about what was next. I had been working for over 30 hours and baby had not made any progress. She was very happy in there and I was feeling pretty good though of course tired. I took Mr. Ramon aside to let him know that I could continue but I felt that we were not going to make any more progress doing the same things we had been doing. I wanted to make sure that any decisions I had to make would be with a clear head. I felt that it was time to explore other options. 

The tough decision was made. We were going to transfer to the University of Washington hospital. This was my ideal place if I had to go to the hospital. They work well with midwives and I knew that they would respect my birth plan. My midwives made the call and had me pre admitted. We gathered our bags and headed over. The goal was to get me some pain relief and then start some Pitosan to get strong contractions going again and push this little girl out. 

I was admitted and had an amazing nurse team to care for me. I received my epidural and was able to rest for the first time in 42 hours. I had been in labor for about 33 hours. The Pitocin was started and I was having contractions off the charts. The doctor came in to check my progress and baby was in the same position she had been in for the last 20+ hours. She sure was happy in there! 

After much discussion with the medical team and some more time to see if the contractions would do any more for my situation we knew there was only one way to get baby out. The medical team had no idea why baby was not moving. They were stumped. It was decided that our only solution was a c section. Boo. This was not what I had planned - but clearly baby girl had her own plan. 

I was prepared and taken to the operation room. Mr. Ramon joined me. The entire team was fantastic through the entire procedure. The moment baby girl was here she was taken over to be wiped down and Mr. Ramon cut her cord. She was then returned to me for some skin to skin on my chest. She was beautiful. Such an amazing moment. 

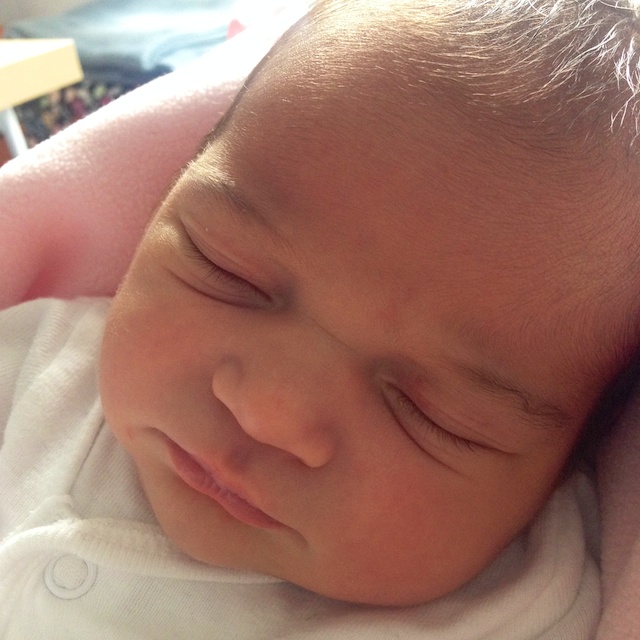
Welcome to the world Lady Paloma Josefina Alvera Vasquez! Born Friday April 18 at 6:33am weighing 8lb and 21 inches long. 

Mr. Ramon and I were over the moon in love with this little girl. After 3 days of recovery we headed home to begin our life as parents. Our lives are forever changed!

Tuesday
Mar182014

Baby Shower Onesie Art Station

What happens when you invite all your talented friends to your baby shower and give them a chance to decorate baby onesies, t shirts and bibs? 

My friend Kalin planned all the games and activities for the baby shower. Since the shower was co-ed, she didn't want the shower to be silly game centric so she planned this awesome art station. 

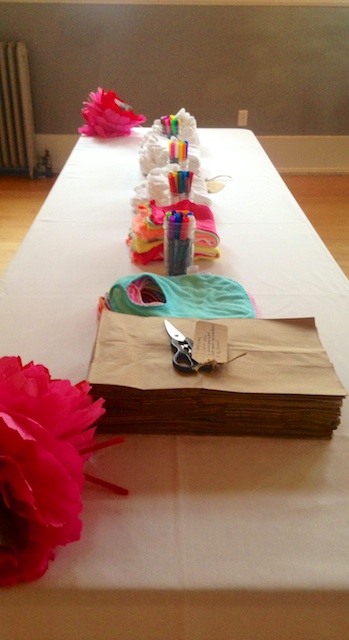
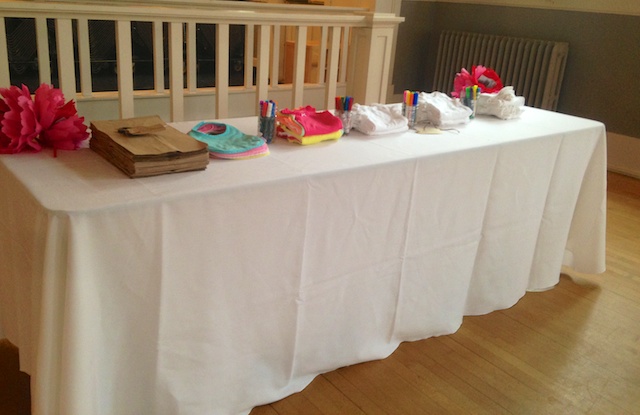
With a guest list of close to 50 it made sense to have a variety of styles and sizes of t shirts and onesies on hand. From newborn, 0-3 months, 3-6 months and 6-12 months also. Also mixed up the styles - short sleeves, long sleeves and summer straps. She also ordered some bibs. This way baby would be able to wear these awesome art pieces throughout her first year. 

For the decorating she picked up several boxes of Crayola Fabric Markers. Kalin used mason jars to hold the pens. All of the items were washed and dried before the shower. The other concern was the possibility of the pens bleeding through the top layer to the back when decorating them. She solved this by laying out small paper bags and scissors allowing the decorator to place a protective layer inside the onesie or t shirt.

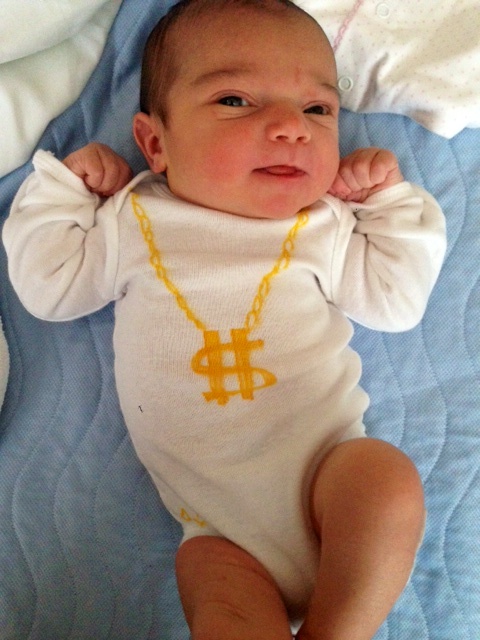
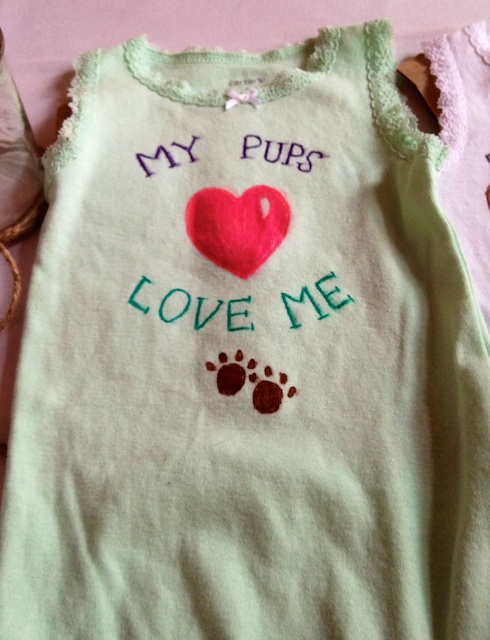
I could not beleive the amazing designs that were put onto these items. It was a big hit with our guests. At one point I looked around and saw everyone head down, quiet and drawing. It was being taken so seriously and fun at the same time. 

The last part of the process for these to be ready for baby to wear is to throw them all in the hottest clothes dryer for about and hour to set the ink.

This was one of the best activities I have ever seen at a baby shower.