Entries in painting (3)

Wednesday
Mar052014

Refinished Baby Armoire

I love the idea of a child sized armoire in little girls room and hanging some of her clothes eventually at her level so she she can choose her outfits. This gives her some independence and that feels great to me. When looking for any type of furniture for a nursery it is very clear that everything is made and designed for the adults. Just about everything we found under the title "armoire" was something I would use in my room. 

I have seen various vintage smaller armoire type pieces over the years on blogs and Pinterest boards but they are few and far between and even rarer in the real world. I started a Pinterest board with ideas and inspiration for what we wanted to find. I was open to converting a dresser to an armoire if we could not find one that was perfect as is. 

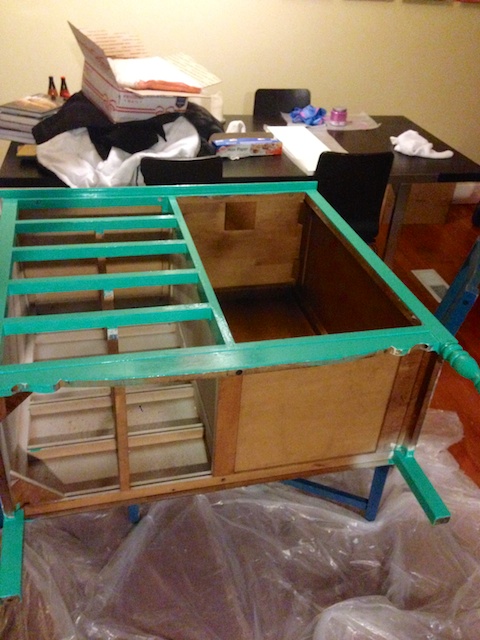
We are lucky to have a really great Goodwill in our neighborhood. We stop in often and have found some great deals over the years. We stopped in one Saturday morning and could not believe our eyes when we found this piece in the furniture section.

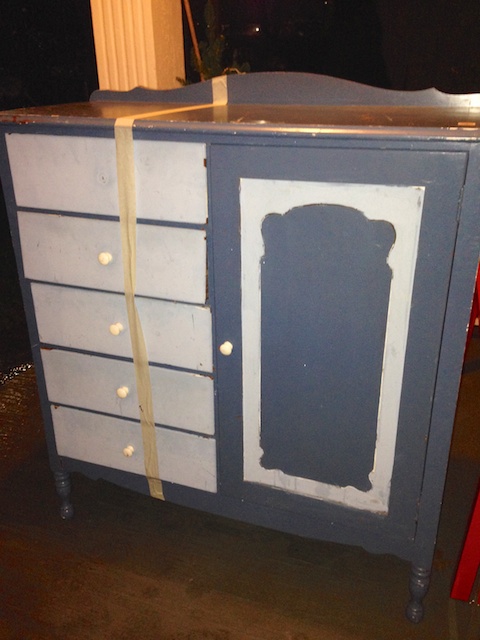
Wowzers!!!! It was exactly what we were looking for! It was priced at only $29! Other than the hideous paint job it only was missing one of the drawer supports - an easy fix. 

I was so excited to get this project started. First we had to pick out a paint color. We settled on Pantone Pool Green

I grew up in a family that built homes, managed remodels and refinished all sorts of furniture. So it is something I love to do. That said, I don't do this everyday so I want to make sure I have all my ducks in a row so the project turns out the best way possible. 

These are the supplies I gathered for this furniture painting project:

  • Sandpaper - usually 3 grits - rough, medium and ultra smooth
  • Primer - I love Zinsser Bullseye 1-2-3 for all my painting projects
  • Tack cloth to get up all sanding residue
  • High quality paint brush
  • Paint in flat finish - I find it goes on with the least amount of brush strokes
  • Minwax Polyacrylic - I usullay use gloss for furniture
  • Blue tape 
  • Floor covering 

First I took the piece apart. Pulled out the drawers, took off the armoire door and the hardware to clean it of old paint residue. 

The armoire had a very thin coat of paint on it so it only required a small amount of hand sanding to get it smooth and ready for primer. Its important to take your time sanding and prepping your piece as every flaw will show through to the final coat of paint. 

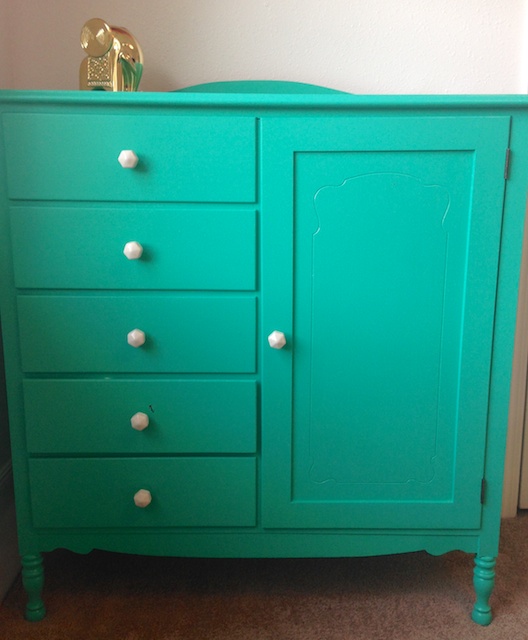
Once my primer had a day to sit and dry very well I followed with 2 coats of the Pool Green paint. I used blue painters tape to tape off areas I did not want to get the gree paint on. Like the back side of the drawer fronts and the inside of the armoire door. 

Once the two coats of paint dry completely I inished the piece with 2 coats of polyacrylic. The reason I use polyacrylic over other types of top coats is because only polyacrylic does not turn yellow over time. I love the gloss on painted furniture and it leaves a nice stong finish for high use pieces. 

Mr. Ramon fixed the drawer support with a leftover piece of wood and we ordered these new white ceramic and gold trimmed knobs from Anthropologie. They made the piece just pop! I was so happy with the final results. It looks terrific in the room.

Tuesday
Feb112014

Quick Bathroom Storage Update

The house Mr. Ramon and I are currently renting went through a total renovation right before we moved in. This 1909 home has some great qualities: original hardwoods downstairs, large closets in each of the 3 bedrooms and a lovely brand new kitchen. Overall the remodel was done pretty well and enhanced the homes value. One big downfall for me is the paint color scheme chosen - the main part of the home  including the ceilings is a "neutral" we call zombie skin and the bath and a half are painted a sage-ish operating green. To say I can't stand this color is an understatement. 

I knew I needed to remedy this bathroom paint choice. I decided to go with a blue grey for both bathrooms. It was an instant change for the better. I wanted to take the downstairs bathroom one step farther. It is pretty bland with a toilet and a pedestal sink with mirror only. No storage options at all. 

There is a lot of space over the toilet for a couple of shelves. This would add some storage options for my makeup brushes, maybe some pretties and a candle for when we have dinner parties. 

I picked up 2 sets of metal shelf brackets at Lowe's. I wanted to add a pop of color to this project so I painted the brackets a neon orange. I love spray paint it is so magical in the way it can transform just about anything. I used this spray painting tutorial to get smooth results. I did use a primer - not only to get it smooth and consistent but to also make the neon paint pop. 

I bought a plain board and cut it the length I needed for the 2 shelves. I then painted it a nice glossy white. But you could easily buy 2 pre made white shelves at any home store. Once every piece had dried for a couple of days I hung them over each other. 

This is where precision comes in. First I marked the center of this wall with pencil. I had a specific small area to hang these sheves in and wanted them to be centered. I also marked the center of the shelf. I lined these 2 marks up and made marks at each end of the shelf on the wall. This allowed me to figure out where each bracket should be. 

I placed the first bracket into the wall with one screw. I then rested the shelf on the attached bracket and used my level to ensure I had the second bracket in the correct location and the shelf was level. I marked a dot in the hole of the second bracket where the screw would go and took off the shelf. I then attached the second bracket wth both screws and placed the second screw in the first bracket. 

The second shelf was easy - I just figured out what spacing I wanted by holding the shelf up to the wall. Then I used the bottom shelf as a guide and hung the brackets. 

The shelves I used were thin so I didn't want to screw the shelf to the brackets. I knew that these shelves would not be holding to many items and nothing super heavy. So I opted for attaching the shelves to the brackets with a strip of Liquid Nails adhesive that I had left over from another project. 

Here they are all done. I let the paint cure on them for about a week before I put anything on them. 

A week later I added some pretty touches and voila - storage!!

I was so glad to get some personality into this space and add a little much needed storage. 

Tuesday
Aug142012

Kiel & Yvonne

I love a party. Birthday, valentines, fiesta, they are all awesome. But the party I love the most is the wedding. This magical time in a couples life - the beginning of a new chapter together. It is magical. So being able to help plan and coordinate this special day with the bride, groom and family is a real treat for me. 

Yvonne and I met about 5 years ago and I was immediately drawn to her. She makes everyone feel special when they are around her. She moved to Chicago to go to law school, then she graduated, passed the bar exam and is now a real deal lawyer. She met her beloved, Kiel in Seattle before moving and after managing a long distnace relationship he moved there to be with her. I don't know Kiel as well as Yvonne - but I do know he is a real deal hunk of a man in love with this beautiful girl. 

When they started planning their wedding I reached out to Yvonne to let her know I would love to help her in any way possible. Planning a wedding is hard but being in another state while planning your wedding is harder. I wanted to make sure her day went smoothly and was everything she wished it could be. 

The wedding ceremony was held in the Seattle Chinese Garden. They were the first couple to be married in the courtyard. It is a beautiful spot and if you are looking for an outdoor location this may be it. 

We repurposed some old cabinet doors to make signs for the wedding. Mr. Ramon was nice and offered his hand lettering skills for this project. They turned out really pretty. 

The reception was held at House of Hong in Seattle. A favorite location for parties and receptions. Me and my team hung over 150 paper decorations to transform the restaurant. Over 100 tissue pom poms on the ceiling over the dance floor and paper mobiles over the dessert buffet and bar. 

I set up the cookie bar with take away bags and hand stamped tags. The family had all pitched in and baked their favorite cookies. The sister of the groom had little cookie cookbooks printed as takeaways. The sister of the bride baked over 20 pies as well. 

At the reception they had a traditional Chinese lion dance at the reception. Something I have never seen - it was really awesome. 

It was a beautiful day made even more so with the bringing together of these two familes.