Friday
Oct192012

Wandering Goose Seattle 

Mr. Ramon and I popped in at the Wandering Goose on their first day open. This cosy spot in Seattle's North Capitol Hill is the work of Heather Earnhardt. Heather is many things and one of them is an amazing baker. I know her work well from Volunteer Park Cafe - she is one half of the talent that brought us this amazing gathering place full of meals to remember. 

I have never met Heather but think I would like too. I love what she is creating here. She seems to have had a rich life that really shows itself in the atmosphere and food at Wandering Goose. The space is small - no more than 30 seats. It fills quickly and has a buzz about it that feels like a family gathering. The tables are raw blonde wood and butt up against pews that line the walls. Every piece in the space feels found and useful. 

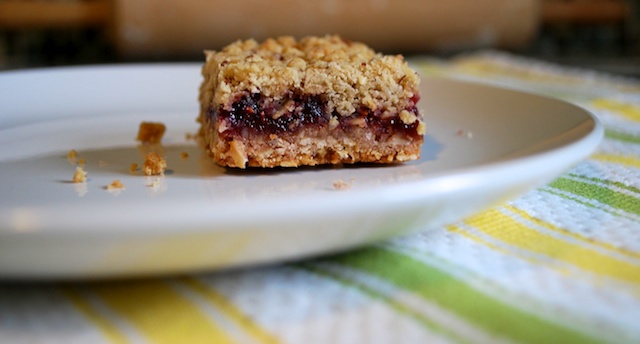
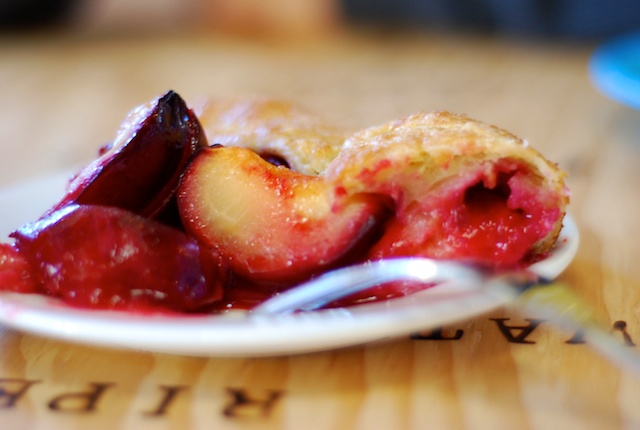
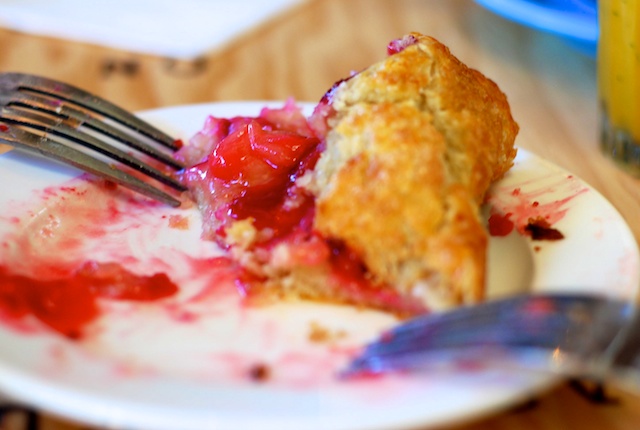
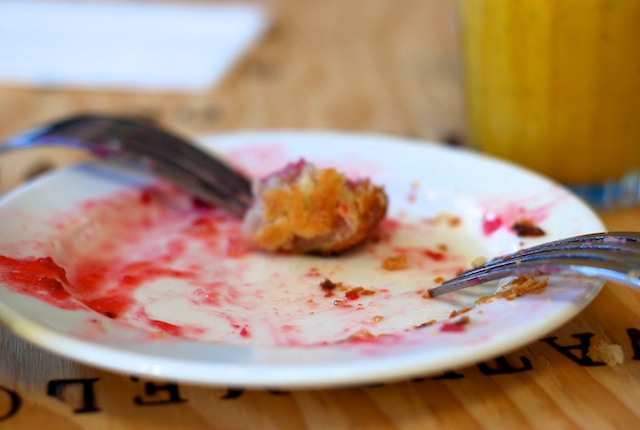
The bakery case is full of gorgeous rustic delights. On our visit we enjoyed the Plum Galette. A superb crust and the delicious fragrance of roasted plums with a hint of almond. We fought over every last bite. 

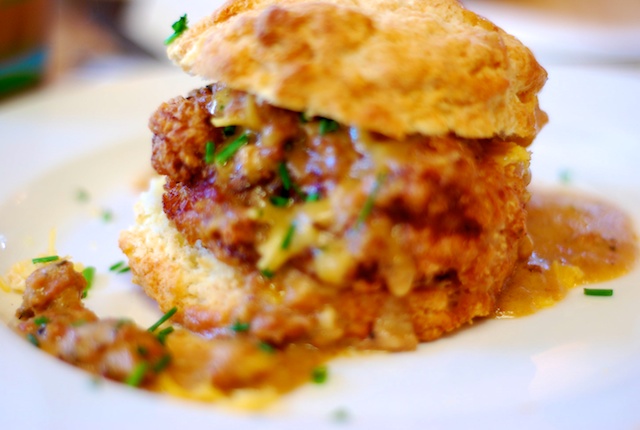
Who am I kidding though - we came for the biscuits. We just missed breakfast and chose two things of the menu to share. "The Easy" a classic egg, bacon biscuit sandwich and "The Sawmill" a  fried chicken biscuit sandwich with the road house gravy. Both of these left me totally satisfied in buttery, salty goodness. 

It was nice to see some familiar faces within the staff and the service was genuine and warm. Both Mr. Ramon and I look forward to making it early for breakfast and trying a few other things off the menu. If you have not had a chance to go yet - do. I know you will enjoy it as much as we did. 

Tuesday
Oct162012

Choosing Household Products

About two years ago I started really looking into the products I use around the house both for cleaning as well as body products. I already had some knowledge and liked to choose products that seemed more "natural" and kinder for the earth. I use a lot of vinegar, washing soda, baking soda and lemons in my cleaning regimen but I do like to have a couple of prepared products on hand. 

The few things I buy prepared for household cleaning are all purpose scrub, dish soap, laundry soap, dishwasher soap and a hardwood cleaner. I have always embraced brands like Method , Mrs. Meyers, Biokleen and Dr. Bronner's. None of these companies test on animals, are biodegradable, use natural ingredients of high quality and seem to really care about the environment and the people using their products. 

I love gathering information so I can make good choices and decisions. One of the resources I use is the Go Cruelty Free website. This is where you can see if the products you use are made by companies that test on animals. There are so many good products available by companies that do not test on animals that it seems silly to not choose one. 

The most recent site I found that has given me some information on the products I use is the Enviornmental Working Group. They firmly believe we have a right to know what products might pose a health or environmental risk and what some solutions might be. Not only limited to products, they have information on our drinking water, cell phone radiation possibilities, sunscreen safety and pesticide residues. All very serious topics. 

I found that some of the products I have loved because they are "natural" are actually full of ingredients that may pose a risk to me or the environment. They grade household products on an A-F scale using these metrics:

  • Asthma/Respitory Risk
  • Skin Allergies/Irritation Risk
  • Developmental/Reproductive Toxicity Risk
  • Cancer Risk
  • Environmental Risk

This new tool helped me look inside the "natural" products I have been using and see what they are made of. A lot of the ingredients on the packages are foreign to me so this was helpful. I do know that even too much of a natural product can be harmful. Of course how often you use these products etc really makes a difference. But if you are suffering from asthma you might want to now which products to avoid.

I did make a list of my current products and check each of them on the site to see what grade they received. After seeing a failing grade on some of my products I made a list of the grade A products that I would be willing to switch to when I need to buy next time.

I thought you might like this information as I think we all deserve the right to know what is in the products we use. 

Wednesday
Oct102012

Raspberry Jam Bars

I love bar cookies. They are the simple no fuss cousins of regular cookies. Mix, dump in pan and bake. So easy. I was so excited to find myself with 2 flats of raspberries last week. I almost never indulge in reaspberries - the short growng season makes them a little too pricey for my budget. But this year our longer than usual sunny streak meant that I got a great deal on these little gems. 

I knew that jam would be in my near future. I followed the same reciped I used for my Strawberry Jam just substituting these berries. It turned out so great - sweet and the color of rubies. I had some left that would not quite fill a jar so I decided to make a batch of Jam Bars. You can use any jam on hand - I love them with apricot also. 

These are really easy to prepare and have a great butttery crust that pairs well with the sweet jam center. These are sure to disappear quickly. 

Raspberry Jam Bars

  • 1 1/2 cups all purpose flour
  • 1 1/4 cups oats
  • 1/3 cup sugar
  • 1/3 cup dark brown sugar
  • 1/4 teaspoon baking soda
  • 1/4 teaspoon salt
  • 1/2 cup walnuts chopped finely
  • 12 tablespoons butter cool room temperature cut into pieces
  • 1 cup raspberry jam

Adjust the oven rack to middle position; heat oven to 350 degrees. Line a 9x9 pan with foil allowing edges to hang over for easy removal. Spray foil-lined pan with nonstick cooking spray. 

In a mixer fitted with a paddle attachment, mix flour through nuts on low speed until combined, about 30 seconds. With machine on low, add the butter and mix until fully combined - about 2 minutes. 

Press 2/3 of the crust into the bottom of the pan with your hand until even. Bake for about 20 minutes until crust is brown. Take out of the oven and spread the jam over the warm crust with the back of a spoon. Take remainder of crust and sprinkle it over the jam. Place back in oven and bake for about 30 minutes and golden brown. 

Cool on a wire rack before removing from pan. Cut 1/4 inch of edge off on each side for a neater presentation. Then cut into squares. 

Sunday
Oct072012

Sleepy Sunday Roast Chicken

Summer slowly wraps up here in Seattle. These last few weeks have been busy ones. Between friendly outdoor gatherings to enjoy these last sunny moments, or dog emergencies and of course regular life stuff, I can say we are tired. It is on Sundays that I always fully realize this. I try to spend Sundays in the store not doing any type of actual business work. No paperwork, planning or organizing. I try to catch up on a book or a mindless tv show between customers as I think about how to make the upcoming week successful. Today I feel like napping on the counter and cannot stop thinking about how nice it would be to sink into my soft cool pillow. 

It is these sleepy moments when it would be easier to put something bad into my mouth for dinner that roast chicken comes in handy. Roast chicken conjures up memories of crispy skin, moist meat and a type of salty goodness that is pure heaven. How to get this kind of roast chicken is a mystery to most. They think it will be hard or take to long. They are worried about flabby skin and overdone dry breast meat. 

I have the perfect solution. Simple and easy this roast chicken recipe will leave you with the perfect meal for those sleepy Sundays and some to spare. 

You will find no vegetables here, no herbs under the skin, no oil. trust me - this is going to be amazing. My goal is to not add anything to the chicken or the cooking that produces steam or moisture. We want crisp skin!

Roast Chicken

  • 1 whole roaster chicken - at room temperature
  • kosher salt 

Preheat the oven to 500 degrees, placing a rack in the lower part of the oven.

Take your chicken and remove the organ meat and neck if stuffed inside the cavity (If you have a dog around - hand out that chicken neck like it is a prize. Great for Fido’s teeth). Rinse chicken under cool water - inside and out. Dry with paper towels and place into a roaster or shallow baking pan. 

Use some kitchen twine to tie his legs together. 

Grab your kosher salt and sprinkle heavily over skin front and back and inside the cavity as well. I good dose of salt is important for the crunchy skin you are looking for. 

Place your chicken in the oven for 15 minutes. Turn down to 350 and roast until temperature in the thigh is 155-160 degrees. If your chicken starts to get too brown, tent a piece of foil and loosely place it over your chicken. 

Remove your chicken from the oven and let rest for at least 5 minutes before carving. 

And here you have a super juicy, flavorful roast chicken for dinner and leftovers for lunch! Enjoy!

Thursday
Oct042012

Canning Tomato Sauce

We were really excited to grow tomatoes this summer. We bought 5 varieties, two of them were paste tomatoes. I wanted to can my own basic tomato sauce. This last year we stopped using canned tomato products after reading this article on the 7 Foods Experts Won't Eat. Mr. Ramon and I have already cut out canned foods like soups, beans etc. When I read this we switched to tetra pack tomatoes as jarred varieties are soooo expensive.

Our tomatoes had s slow start due to the long cold spring. This past month and a half have been super sunny and we have had some really good yields. That allowed me to can up my first tomato sauce.

It all starts with fresh ripe tomatoes. Here are some of the San Marzano I used for this sauce. Beautiful!

A quick wash and remove the stems. There are many ways to go about sauce and I am lucky to have a Vita Mix Blender that I can use to puree them, skin and all. Without this option you would want to quick blanch them in hot water and toss into an ice bath to slip the skins off. I also leave the seeds in as they will be pureed as well. You could remove the seeds if you want. 

Once I have them blended super smooth I put them in a large stock pot to cook down to my desired thickness. I left this sauce a little thin knowing I can always thicken it when I use in in my recipes. 

While it simmers away I sterilized my jars and got my water bath ready to process them once filled. 

I added some lemon juice to each jar, filled with the hot tomato sauce and processed for 35 minutes. Here are the gorgeous jars once done. I hope to get enough tomatoes to make up a couple more batches. 

Tomato Sauce

Wash, trim and remove stems from your tomatoes. 

If you have a high powered blender you can belnd your tomatoes with then skins and seed intact until smooth. 

If you want to remove the skins: drip each tomato into boiling water for 30-60 seconds until skins split. Immediately put tomatoes into ice water. Remove skins with your hands. 

If you want to remove the seeds, slice in half and scoop out with a spoon. 

If you are not pureeing in a blender, you will need to simmer tomatoes until soft then puree with a hand blender, blender or food processor until smooth. 

Place your pureed tomatoes into a saucepan or stock pot and bring to a boil. Turn down to a simmer and let simmer until you reach the desired consistency. 

Using sterilized jars, add 2 teaspoons per quart or 1 tablespoon per pint of lemon juice in the bottom of each jar. Fill with hot tomato sauce up to 1/2 ince from rim. Place hot lid and rings on and tighten. Water bath process for 35 minutes.