Thursday
Oct242013

For the love of grilled cheese!

Recently all I want to eat is grilled cheese. Toasty, melty, buttery grilled cheese. I think about it all the time. Nothing fancy either - just good white bread with some american cheese stuffed inside, buttered up and toasted until it is ooey gooey. I tried to think this craving came from the change of seasons. After all isn't time for warm food and butter? But more realistically this is probably some sort of weird pregnancy thing - one at least that makes me very happy. 

I stopped by Skillet Diner with Mr Ramon and ordered their grilled cheese. They do an amazing grilled cheese. american, cheddar and brie on toasted brioche. I hate to say it though - the brie ruins it for me, so I order it without. They pack it with cheese, it is so gooey! It hit the spot. 

Later that weekend we went to pick up some groceries and decided to make our own version of the ultimate grilled cheese. I think that mixing cheeses makes a great grilled cheese and it is one of my little secrets. We found a piece of cheese that was a fontina/white cheddar blend. That seemed like a good melter. We also picked up some american slices. I know - not really cheese but I love the stuff in a melted sandwich. The last component was the bread. I thought brioche might be to heavy so we went for a nice thick white bread. 

My other secret to a good grilled cheese is shredding the cheese instead of slicing it. It helps it melt quicker so your bread does not get over browned while you are waiting for the cheese to melt.  

Ultimate Grilled Cheese 

Makes 2 sandwiches

1/4lb grated cheddar or cheddar fontina blend

4 american cheese slices

4 slices thick white bread 

butter

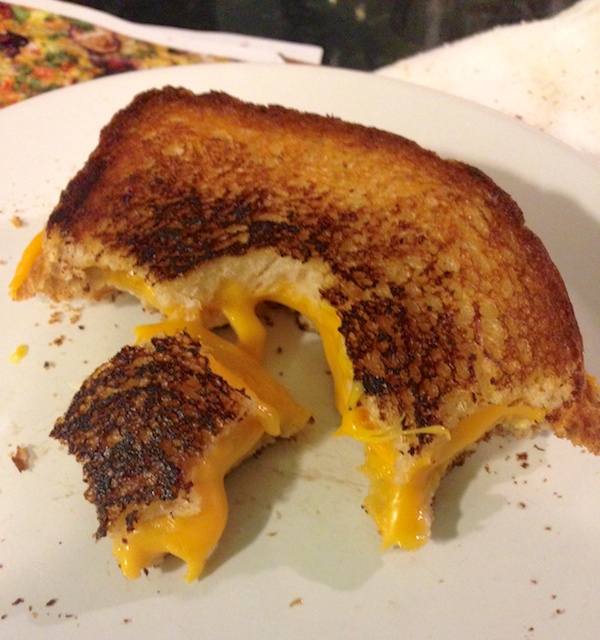
Heat a grill pan or skillet to medium heat. Butter outside of two slices of bread and place on hot pan. Divide grated cheese between the two slices of bread. Add the american slices on top of the grated cheese. Place the other two slices of bread on the sandwiches and butter the outsides. 

When the first side in the pan is crispy and brown, flip over to the other side and let it toast nice and brown. Your cheese should be melted all the way through. Remove from pan - slice and enjoy!!

Friday
Oct182013

Back to the land of the living!

While summer plowed forward around me I tried to just hold my own against the storm of nausea, food aversions and extreme tiredness. I desperately wanted to hold BBQs, go out with friends and have some sort of a normal life. And while I am very aware that what I went through is mild compared to what some pregnant women experience during the first trimester, this was all new to me.

I am the girl with 2 paying jobs, 1 volunteer job, a couple of “job hobbies”, three active dogs, a husband and lots of side projects. My days are usually packed to the gills with lists and activities. During these months I found that I could pretty much only do one thing a day other than work. On some days just going to work was all I could do. I would fall asleep on the couch at 8pm like an old lady. I would clean the kitchen and declare that I was done for the day. I have never been tired like this before.

Then came the food aversions. This was such a strange thing to me - I have never had an aversion to anything! Eggs were out for awhile, the idea of a runny yolk just made me terribly uncomfortable. Mr. Ramon brought home some oysters one night and I could not even look at them - I had cereal for dinner that night. Sometimes just a certain type of food did not sound pleasing. Nope - not pizza and not a burger. Weird stuff for sure. Cereal, toast and drinks with bubbles were my friends. And refried beans - what? Warm bowls of refried beans with salsa - bland, warm food - so comforting.


Nausea is my kryptonite. As a child I had pretty severe motion sickness. It caused my mom to announce on field trips as I entered the bus “My daughter has motion sickness and has to sit at the front”. Mortifying! I could not read in a car. Roller coasters seemed fun but left my brain scrambled and my forehead clammy. The idea of nausea makes me want to offer up a toe to be removed as a trade off. This was the one “symptom” of pregnancy that I could have lived without.

Finally I made it to the other side. I counted down the days and weeks until I was supposed to find some relief. And like a light switch it was off. I had a surge of energy that even surprised me. Food sounded good again - some things were and are a little weird for me but more or less I am back to normal. Nausea - gone!!

So onward I go into the next phase of this journey. I hope I can continue to feel this good!!

Monday
Oct142013

Happy News!!

Mr. Ramon and I recently announced some very exciting news. We are having a baby! This little bundle of joy will be arriving in April 2014. We are both over the moon!! 

Here is the adorable announcement we sent out via Facebook

Monday
Oct142013

Preserving Onions - Freezing

While this may sound like a no-brainer - it was a nice "light bulb" moment for me. When faced with a large amount of Walla Walla Sweet Onions from my garden and the desire to keep them around until I was ready to use them I had to ask myself "Can I freeze onions?". Of course I can!! What an easy way to store them. 

If you find yourself with an abundance of onions or even 1 that you want to not waste here is a great way to keep it on hand. 

You need your onions, freezer quart size bags and a way to chop - I used my Cuisinart food processor. I just didn't have it in me to chop the many onions I had by hand. 

Peel and chop your onions to the size you like them. I like a small dice. Then scoop them into the freezer bags in measured amounts. I went with 1 cup per bag. Seems like a common amount for a recipe. Squeeze all the air out and seal the bag. I used a permanent marker to label each bag. I placed them on a cookie sheet and slipped them into the freezer. 

Voila!! Already chopped onions ready to go for the next cooking adventure!! 

Tuesday
Oct082013

Preserving Onions - Pickling

I had no idea that our garden was going to blow up this summer!! With that came an amazing crop of Walla Walla Sweet Onions. These onions are amazing and we loved using them in all of our cooking all summer long. These onions are so popular they have their own website dedicated to them. Check it out if you want to learn more about these special onions. 

The rough part about sweet onions is that they do not store well due to the high sugar content. I wanted to find a couple of ways to hold on to these guys as long as possible. 

With the amount of pickling and preserving I have been doing I thought that some of these would be awesome as pickles. This is a quick and easy way to make a tasty addition to your pantry. I imagine they will be great on burgers, with a relish tray and even right from the jar!!

Ball is the expert on home preserving. So I would check out their site if you are new to preserving or if you need a brush up on procedures. They have a great "Getting Started" area of their site. For this recipe of Pickled Sweet Onions you will need the following canning items -  

  • Jars with lids and rings
  • A jar lifter (handy to keep you from getting burned)
  • A large pot to sanitize your jars and water bath them once filled
  • Pot holders

Follow the steps to sanitize and heat your jars and heat your lids. Then prepare the onions and pickling brine.

Walla Walla Sweet Onion Pickles

2lbs Walla Walla Sweet onions - or other sweet onions available 

Spices - peppercorns, dried chilies, bay leaves, mustard seed - your sky is the limit!!

Peel and cut the onions as desired. I made some chunks as well as some thin slices that will be great for burgers.

Brine

1/2 c Sugar

2 1/2c White Vinegar

1/2 tsp Canning/Pickling Salt

Bring all ingredients to a boil 

Once you have all your ingredients ready to go it is time to fill jars!

Place your desired spices into the bottom of your jars. I went basic with peppercorns and bay leaves in a couple and dried hot chilies in another. 

Pack your onions into the jars and ladle in hot brine leaving 1/2 inch room at the top of the jar. 

Wipe any brine from the edge of jars and place hot lids on then screw just tight with ring. 

Place in water bath for 15 minutes. 

Let cool on counter after water bath and then store in cool location. Enjoy after 4 weeks!!