Monday
Jul072014

Roasted Broccoli

I recently took a personal chef gig. Sounds awesome doesn't it. And for a new mom with a 11 week old baby it is awesome. I plan menus, shop then go into my clients home one day a week and prepare several dinners for them to reheat. The menus revolve around lean proteins and vegetables. So I am always looking for ways to coax flavor out of ordinary vegetables and make them more exciting. One way to do that is by roasting. I prepare a lot of roasted vegetables in the winter but also love them in the summer and find that they are great cold leftovers added to a salad. 

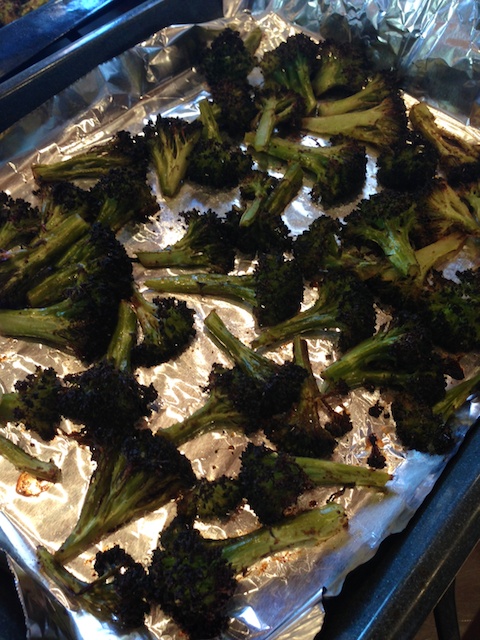
This week I decided to add some broccoli into the mix. I have a slight disdain to steamed broccoli. To many nights in the early nineties, steamed broccoli was on my Weight Watchers dinner menu. I find though that if I roast it with some tasty seasoning it becomes quite magical. 

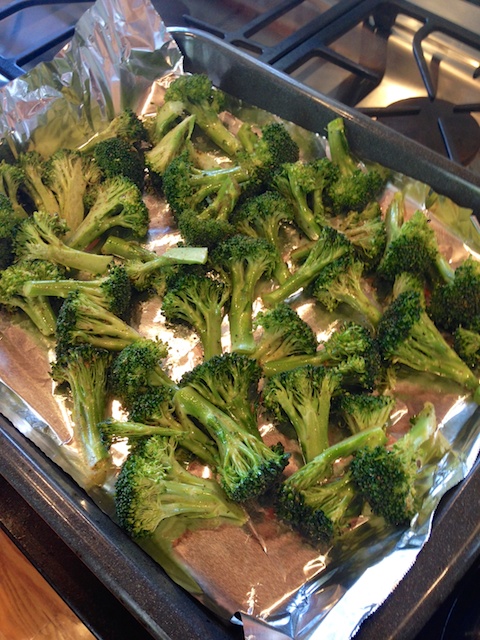
It is one of the easiest things you can do. Cut up the broccoli and toss into a bowl. Add some olive oil to lightly coat. Sprinkle with desired seasoning and lay out into a cookie sheet. I line mine with foil for easy clean up. Throw it in the oven at 375 degrees and about 30 minutes later you have transformed your broccoli. 

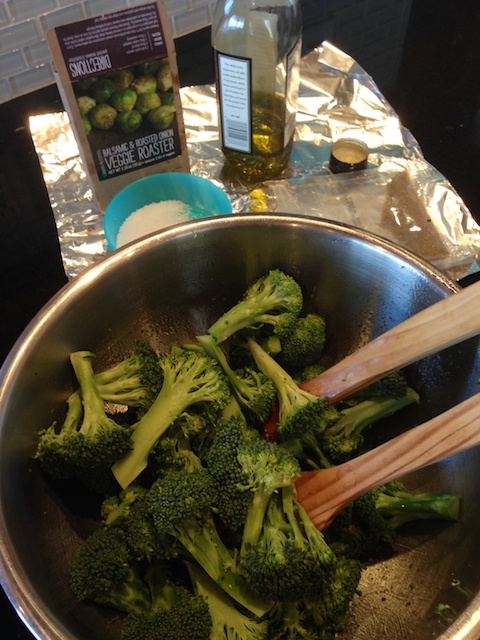
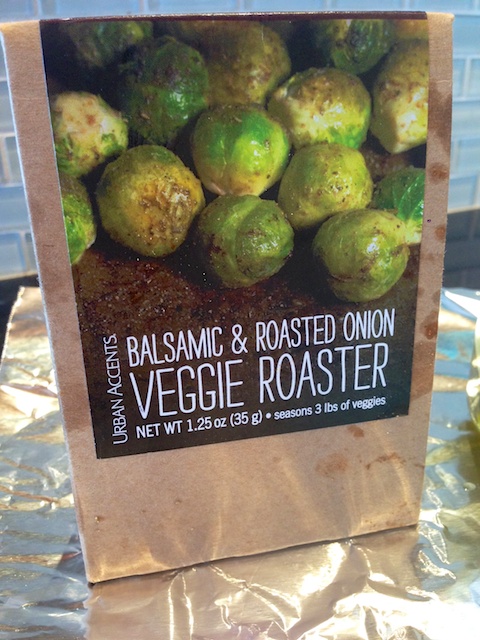
I love to try out new premixed vegetable seasoning mixes. Whole Foods, Cost Plus, Food 52 and the like usually have a variety of seasonings for vegetables. The one I bought recently is from Urban Accents. It is the Balsamic and Roasted Onion Vege Roaster. I found it at my local Safeway. Occasionally I will also find some great spice blends at the Marshalls near me. So look around and pick a couple up to experiment with. It can really add some depth of flavor that beats just salt and pepper.

You now have a great side dish to go with just about anything and the leftovers can be used in omelettes, salads and more.

Hope you decided to take your broccoli to the next level soon!

Thursday
Jun262014

Baby Wipe Solution

There are a lot of baby wipe options out there. We went with cloth re-useable wipes for our home. We have been diapering baby with cloth diapers since 2 weeks old. Along with cloth diapers we are using the cloth wipes I made before baby was born. I love the flannel fabric I made them from so soft. I also double sided them so they are thick and don't bunch up in your hand like the single ply cloth wipes can. 

There are several ways to moisten your wipes for use and many options of what to wet them with. Some people like to keep their wipes dry and moisten them with a small spray bottle as needed during changing the baby. I just imagined a disaster - a squirt bottle in the dark, during a diaper change. 

You can also pre moisten wipes and store them in a container near the changing area. This is the method we went with. I wash them with the diapers and take them out of the washer wet - no need to dry them if I am just going to moisten them. I fold them in half and stack them to get them ready to soak in wipe solution. 

When it comes to solutions there are many recipes out on the world wide web. Many of them contain essential oils. Some babies are sensitive to oils - so be cautious when making your own wipe solution. Your baby's skin does not really need many ingredients to clean it. In fact - many people just use water and during a really rough patch of diaper rash I switched to water and it works really well. 

I decided to go with Baby Wipe Juice. One bottle makes 2 gallons, it is organic and full of beautiful ingredients like aloe, lavendar and olive oil.

To get my wipes ready for use - I take one cup of water with a couple of teaspoons of wipe juice and stir together. I place my wipes in a bowl and pour the wipe juice water mixture over the wipes. I then squeeze them together to make sure they are all saturated. 

To make sure they stay fresh I only prepare enough for a couple of days and store them in this awesome wipe holder. The Perfect Pull Wipe Dispenser holds traditional wipes as well as cloth wipes. It seals nicely when closed to keep wipes moist and has a weighted plate to hold wipes in place when you pull one up. It also has rubber feet to keep it from sliding around when you pull up a wipe. 

Wether you make them yourself or buy them pre made, I really encourage you to switch to cloth wipes. So nice for your little ones skin and so much less waste. 

Wednesday
Jun042014

Introducing Lady Paloma


Amazing to look and see that my last post was 2 months ago. It seems like time has flown by. The last few weeks of my pregnancy I really started nesting and preparing our home for the arrival of baby girl. My actual due date was April 8 so I wanted to make sure all of my "to do" items were checked off in plenty of time. 

My due date came and went and at 41 weeks and 1 day my labor began. As the day and my contractions progressed I finished up preparations around the house for our home birth. I baked a yummy Apple Cake for our birth team and Mr. Ramon and I made a baked pasta dish for everyone to enjoy once baby had arrived. The labor tub team arrived and filled our tub in the living room. 

About midnight our doula, Brenda arrived. My contractions were about 6 minutes apart and strong. About this time I started to not remember the details of my labor. I was working hard. When my midwife arrived about 2am she confirmed I was headed toward the arrival of baby girl. I spent the night laboring hard - doing stair lunges and other positions to try and get baby girl to move down into position. 

Thursday morning - Mr. Ramon, Brenda and I walked the neighborhood and did lunges up a hill. I labored some in the birth tub, more lunges and tough positions to move baby. She seemed super content to hang out where she was even though my body and the entire house were ready to greet her. My contractions were slower and less intense - my body seemed to know that baby was in no hurry to arrive. My midwives pulled some tricks out of their tool bag and got my labor started up again - we wanted to get things moving to see if we could get baby girl to come on down! 

Thursday night - whew. My midwives and I had the big talk about what was next. I had been working for over 30 hours and baby had not made any progress. She was very happy in there and I was feeling pretty good though of course tired. I took Mr. Ramon aside to let him know that I could continue but I felt that we were not going to make any more progress doing the same things we had been doing. I wanted to make sure that any decisions I had to make would be with a clear head. I felt that it was time to explore other options. 

The tough decision was made. We were going to transfer to the University of Washington hospital. This was my ideal place if I had to go to the hospital. They work well with midwives and I knew that they would respect my birth plan. My midwives made the call and had me pre admitted. We gathered our bags and headed over. The goal was to get me some pain relief and then start some Pitosan to get strong contractions going again and push this little girl out. 

I was admitted and had an amazing nurse team to care for me. I received my epidural and was able to rest for the first time in 42 hours. I had been in labor for about 33 hours. The Pitocin was started and I was having contractions off the charts. The doctor came in to check my progress and baby was in the same position she had been in for the last 20+ hours. She sure was happy in there! 

After much discussion with the medical team and some more time to see if the contractions would do any more for my situation we knew there was only one way to get baby out. The medical team had no idea why baby was not moving. They were stumped. It was decided that our only solution was a c section. Boo. This was not what I had planned - but clearly baby girl had her own plan. 

I was prepared and taken to the operation room. Mr. Ramon joined me. The entire team was fantastic through the entire procedure. The moment baby girl was here she was taken over to be wiped down and Mr. Ramon cut her cord. She was then returned to me for some skin to skin on my chest. She was beautiful. Such an amazing moment. 

Welcome to the world Lady Paloma Josefina Alvera Vasquez! Born Friday April 18 at 6:33am weighing 8lb and 21 inches long. 

Mr. Ramon and I were over the moon in love with this little girl. After 3 days of recovery we headed home to begin our life as parents. Our lives are forever changed!

Wednesday
Apr022014

Coconut Oil Granola 

Even as a kid I loved granola. But back then it was Quaker granola out of a box. I remember my mom buying it for my dad and it was supposed to be hands off for the kids since it was expensive on our family budget. I always snuck a little when I was up early and loved to shake the box to find the large clumps and pick them out. 

I baked my first batch of granola about 10 years ago, giving it as holiday gifts. Ever since then I have been hooked on having my own homemade granola in the house. It is incredibly simple to make and can be customized with so many spices, nuts and dried fruits. I love it with milk as cereal or topping yogurt and fruit. So versatile. 

Today I needed to fill my granola jar and decided to bake up a quick batch using what I had on hand. The only nuts I had on hand were cashews and for dried fruit I pulled out some cranberries. I always toast my nuts on a baking sheet at 350 degrees until fragrant. Watch them so you don'r burn them. Once they cool give them a rough chop. You will add the fruit and nuts once the granola is baked and cool.

Coconut Oil Granola

4 cups thick rolled oats

1/2 cup flaxseed meal

1/2 cup wheat germ

1 teaspoon kosher salt

1 1/2 teaspoon cinnamon 

2/3 cup coconut oil

2/3 cup honey

1 cup toasted nuts

1 cup dried fruit 

Preheat oven to 325 degrees

Line baking tray with parchment paper

In a large bowl mix the dry ingredients. Warm the oil and honey in a small pan over medium heat. Pour warm oil/honey mixture over dry ingredients and mix to combine. Spread over baking tray. 

Bake for 10 minutes then stir and turn granola on tray. Bake for another 10 minutes. 

Let cool completely then add dried fruit and nuts. Mix thoroughly and store in an airtight container for 2 weeks. 

Wednesday
Mar262014

Easy Vegetarian Three Bean Chili

As we get close to the arrival of baby girl I have been determined to fill the freezer with portioned meals that can be thawed as needed. Foods that freeze well are baked pasta dishes, many casseroles, soups and chili. One of our favorite big batch meals is this super easy Three Bean Chili. I will often make up a batch for weekday lunches - the first couple of days we eat it as a regular chili topped with avocado and sour cream. Then we portion it over rice or a baked potato. It is super tasty, filling and versatile. 

Vegetarian Three Bean Chili

2 carrots 

1 large onion

1 jalapeno seeded

3 garlic cloves

olive oil

1 1/2 teaspoons dried oregano - crumbled

1 1/2 teaspoon cumin

1 1/2 teaspoon chili powder

1 chipotle chili canned in adobo sauce - minced

1 28 oz can whole plum tomatoes - drained and crushed

1 bay leaf

1 15oz can each - kidney beans, garbanzo beans, pinto beans - drained and rinsed

2 1/2 cups water

1 1/2 teaspoons coarse salt

1/4 teaspoon ground black pepper 

1/2 bunch swiss chard - stems removed and cut into 1 inch pieces

Toppings

diced avocado 

lime wedges 

chopped cilantro 

sour cream

Chop by hand the first 4 vegetables or throw them into the food processor and pulse until chopped. 

Heat 1 tablespoon of olive oil in stock pot over medium heat. Add chopped vegetable mixture and cook until softened about 8 minutes. 

Add oregano, chili powder and chipotle pepper and cook, stirring constantly for 2 minutes.

Add the next 6 ingredients through pepper and bring to a simmer. Reduce heat to low simmer, cover and cook for 1 hour. 

Remove bay leaf. Add swiss chard.

Cook uncovered for 20 minutes to allow chili to thicken.

Serve chili with toppings such as avocado, lime and sour cream. It also is delicious over brown or white rice or a baked potato. 

This recipe freezes very well. It makes about 8 servings of 1 cup each. Let chili cool and portion into freezer containers or quart size freezer bags. Soups and chili portioned into bags lay flat when filled and take up less room in your freezer. Remove all air from bags when sealing and label with name of recipe and date. When ready to eat, just pull out and let thaw in refrigerator then gently heat on stove or in microwave. 

This recipe is sure to become a favorite of your families for weekday meals or super convienient freezer meals.